Dokümanlar nasıl düzenlenir
Bu açıklama yalnızca İngilizce belgeleri düzenlemek içindir. Tüm yeni bilgiler önce İngilizce olarak eklenmelidir. Diğer dillere çeviri yapmak istiyorsanız (teşekkür ederim), lütfen crowdin kullanın.
For hints how to format text (headline, bold…) and set links please see the “code syntax” section of this page.
Genel
Herhangi bir sorunuz, geri bildiriminiz veya yeni fikirleriniz için discord aracılığıyla dokümantasyon ekibiyle iletişime geçebilirsiniz. Çekme isteği yapmak zor değil, belgeleri düzenlemenize yardımcı olabiliriz.
Bir noktada bir çekme isteği (PR) yapmanız önerilecektir. PR, çekme isteğinin kısaltmasıdır ve GitHub’da depolanan bilgileri eklemenin veya düzenlemenin bir yoludur. Aslında bir tane yapmak çok zor değil ve katkıda bulunmak için harika bir yol. Bu dokümantasyonlar, sizin gibi insanlar PR’lar yaptığı için burada. Bir hata yapmaktan veya bir şekilde yanlış dokümantasyonu düzenlemekten endişe etmeyin. Değişiklikler “resmi” AndroidAPS belge deposunda birleştirilmeden önce her zaman bir inceleme süreci vardır. PR sürecindeki herhangi bir kazayla orijinalleri bozamazsınız. Genel PR prosesi:
Mevcut içeriği düzenleyerek kod veya dokümanlarda düzenlemeler ve iyileştirmeler yapın.
Düzenlemelerinizin iyi görünüp görünmediğini bir kez daha kontrol edin.
İnsanların düzenlemeleri anlayabilmesi için nelerin değiştiğine dair birkaç not alın.
Yöneticilerden değişikliklerinizi kullanmalarını isteyen bir çekme isteği oluşturun.
Bir inceleme yapacaklar ve (1) değişikliklerinizi birleştirecekler, (2) değişiklikleriniz hakkında size geri dönüş yapacaklar veya (3) değişikliklerinizle yeni bir doküman başlatacaklar.
(Yan not: Görsel öğrenen biriyseniz, burada PR iş akışını gösteren bir YouTube videosu mevcuttur.)
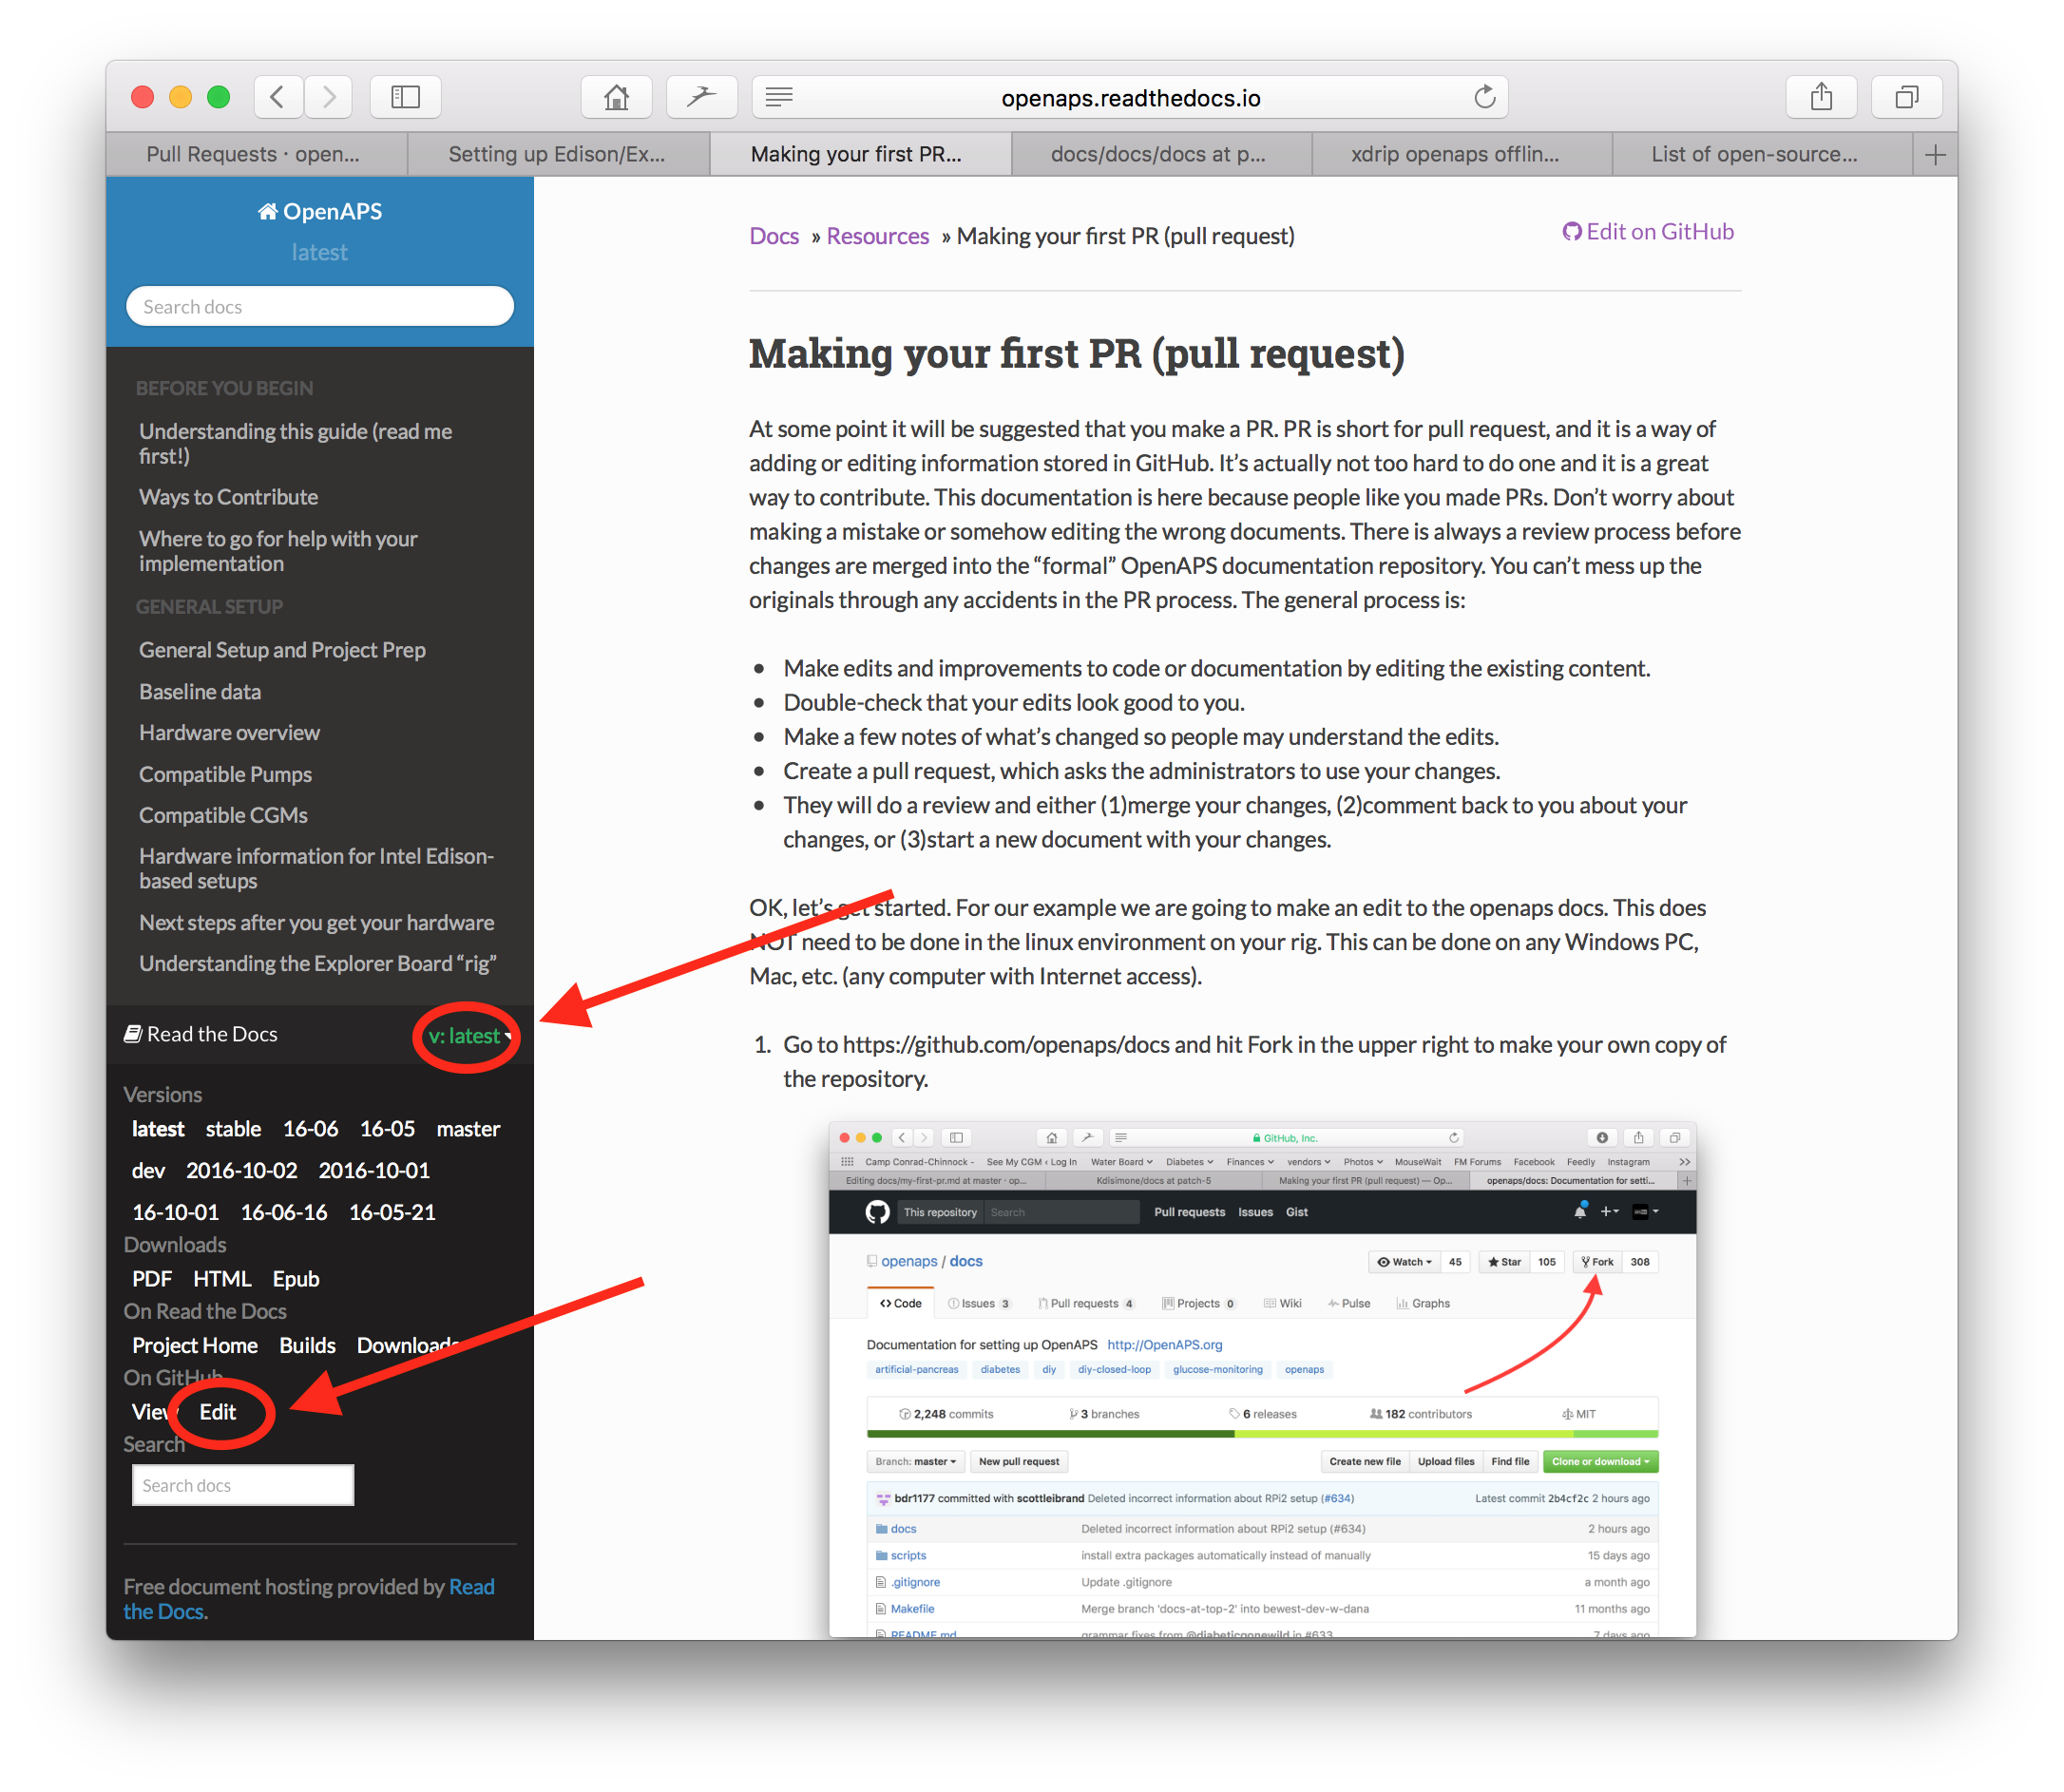
Örneğimizde AndroidAPSdocs’ta bir düzenleme yapacağız. Bunun sadece bilgisayarınızdaki linux ortamında yapılması GEREKMEZ. Bu, herhangi bir Windows PC, Mac, vb. üzerinde yapılabilir. (İnternet erişimi olan herhangi bir bilgisayar).
https://github.com/openaps/AndroidAPSdocs adresine gidin ve havuzun kendi kopyasını oluşturmak için sağ üstteki Fork’a basın.

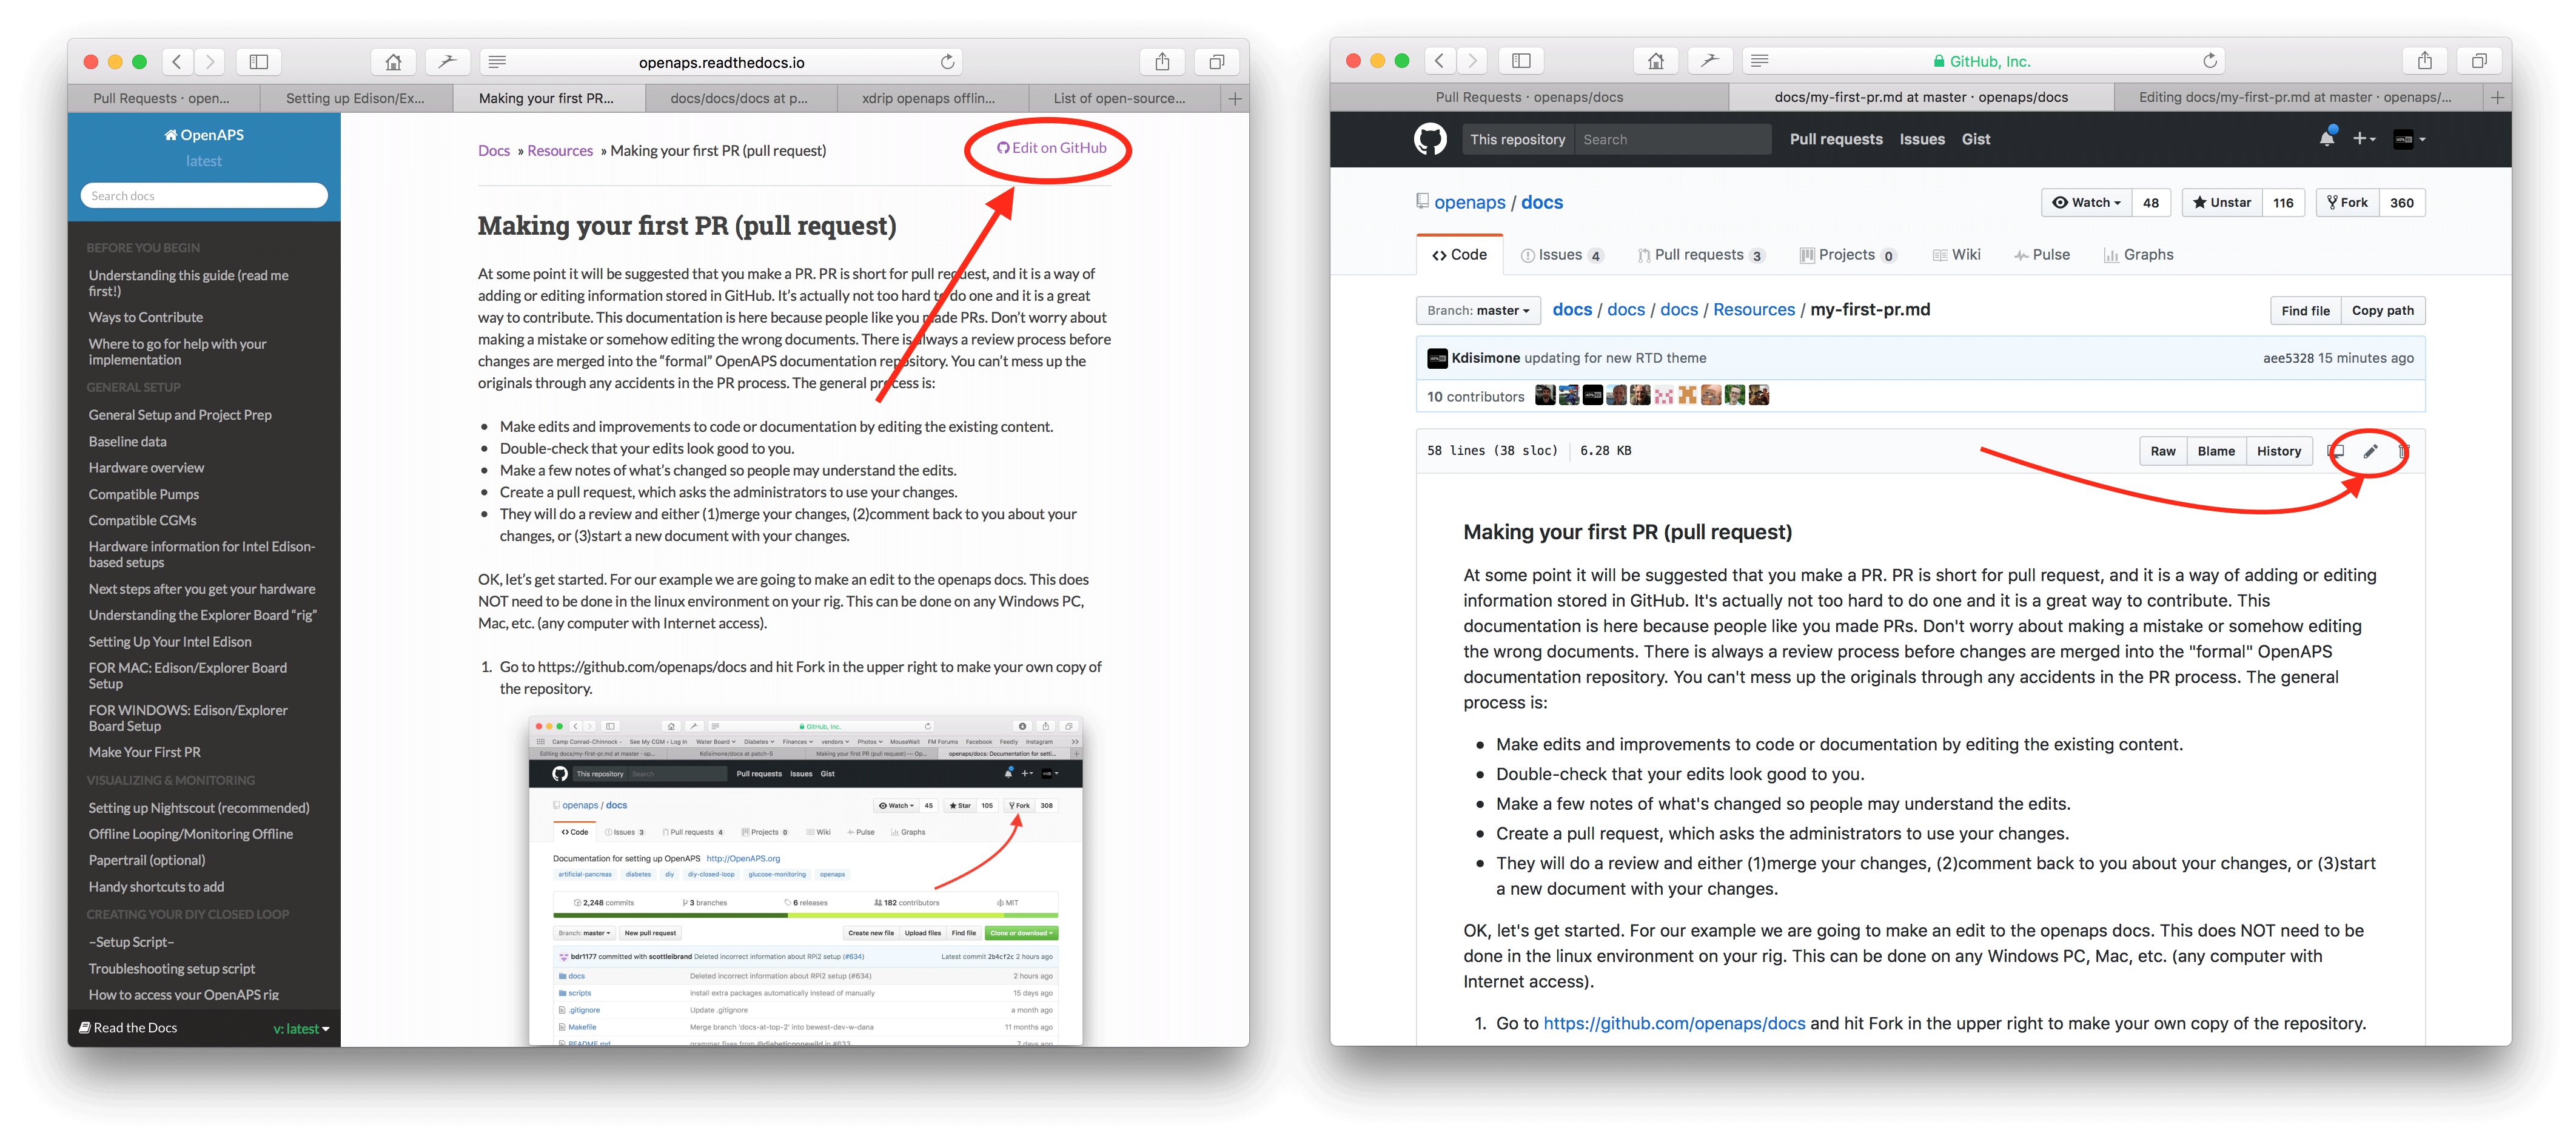
Herhangi bir sayfaya giderek ve düzenlemek istediğiniz dokümana ulaşın. Sayfanın sol alt kısmında yeşil “v: en son” veya benzeri bir kelime bulunan kara kutuya tıklayın. Görünen açılır pencerede GitHub’da düzenlemek için “düzenle” kelimesini tıklayın.
Veya sağ üst köşedeki "GitHub'da Düzenle" bağlantısına tıklayabilir ve ardından düzenlenecek sayfa içeriğinin üst çubuğunda görünen kalem simgesine tıklayabilirsiniz.
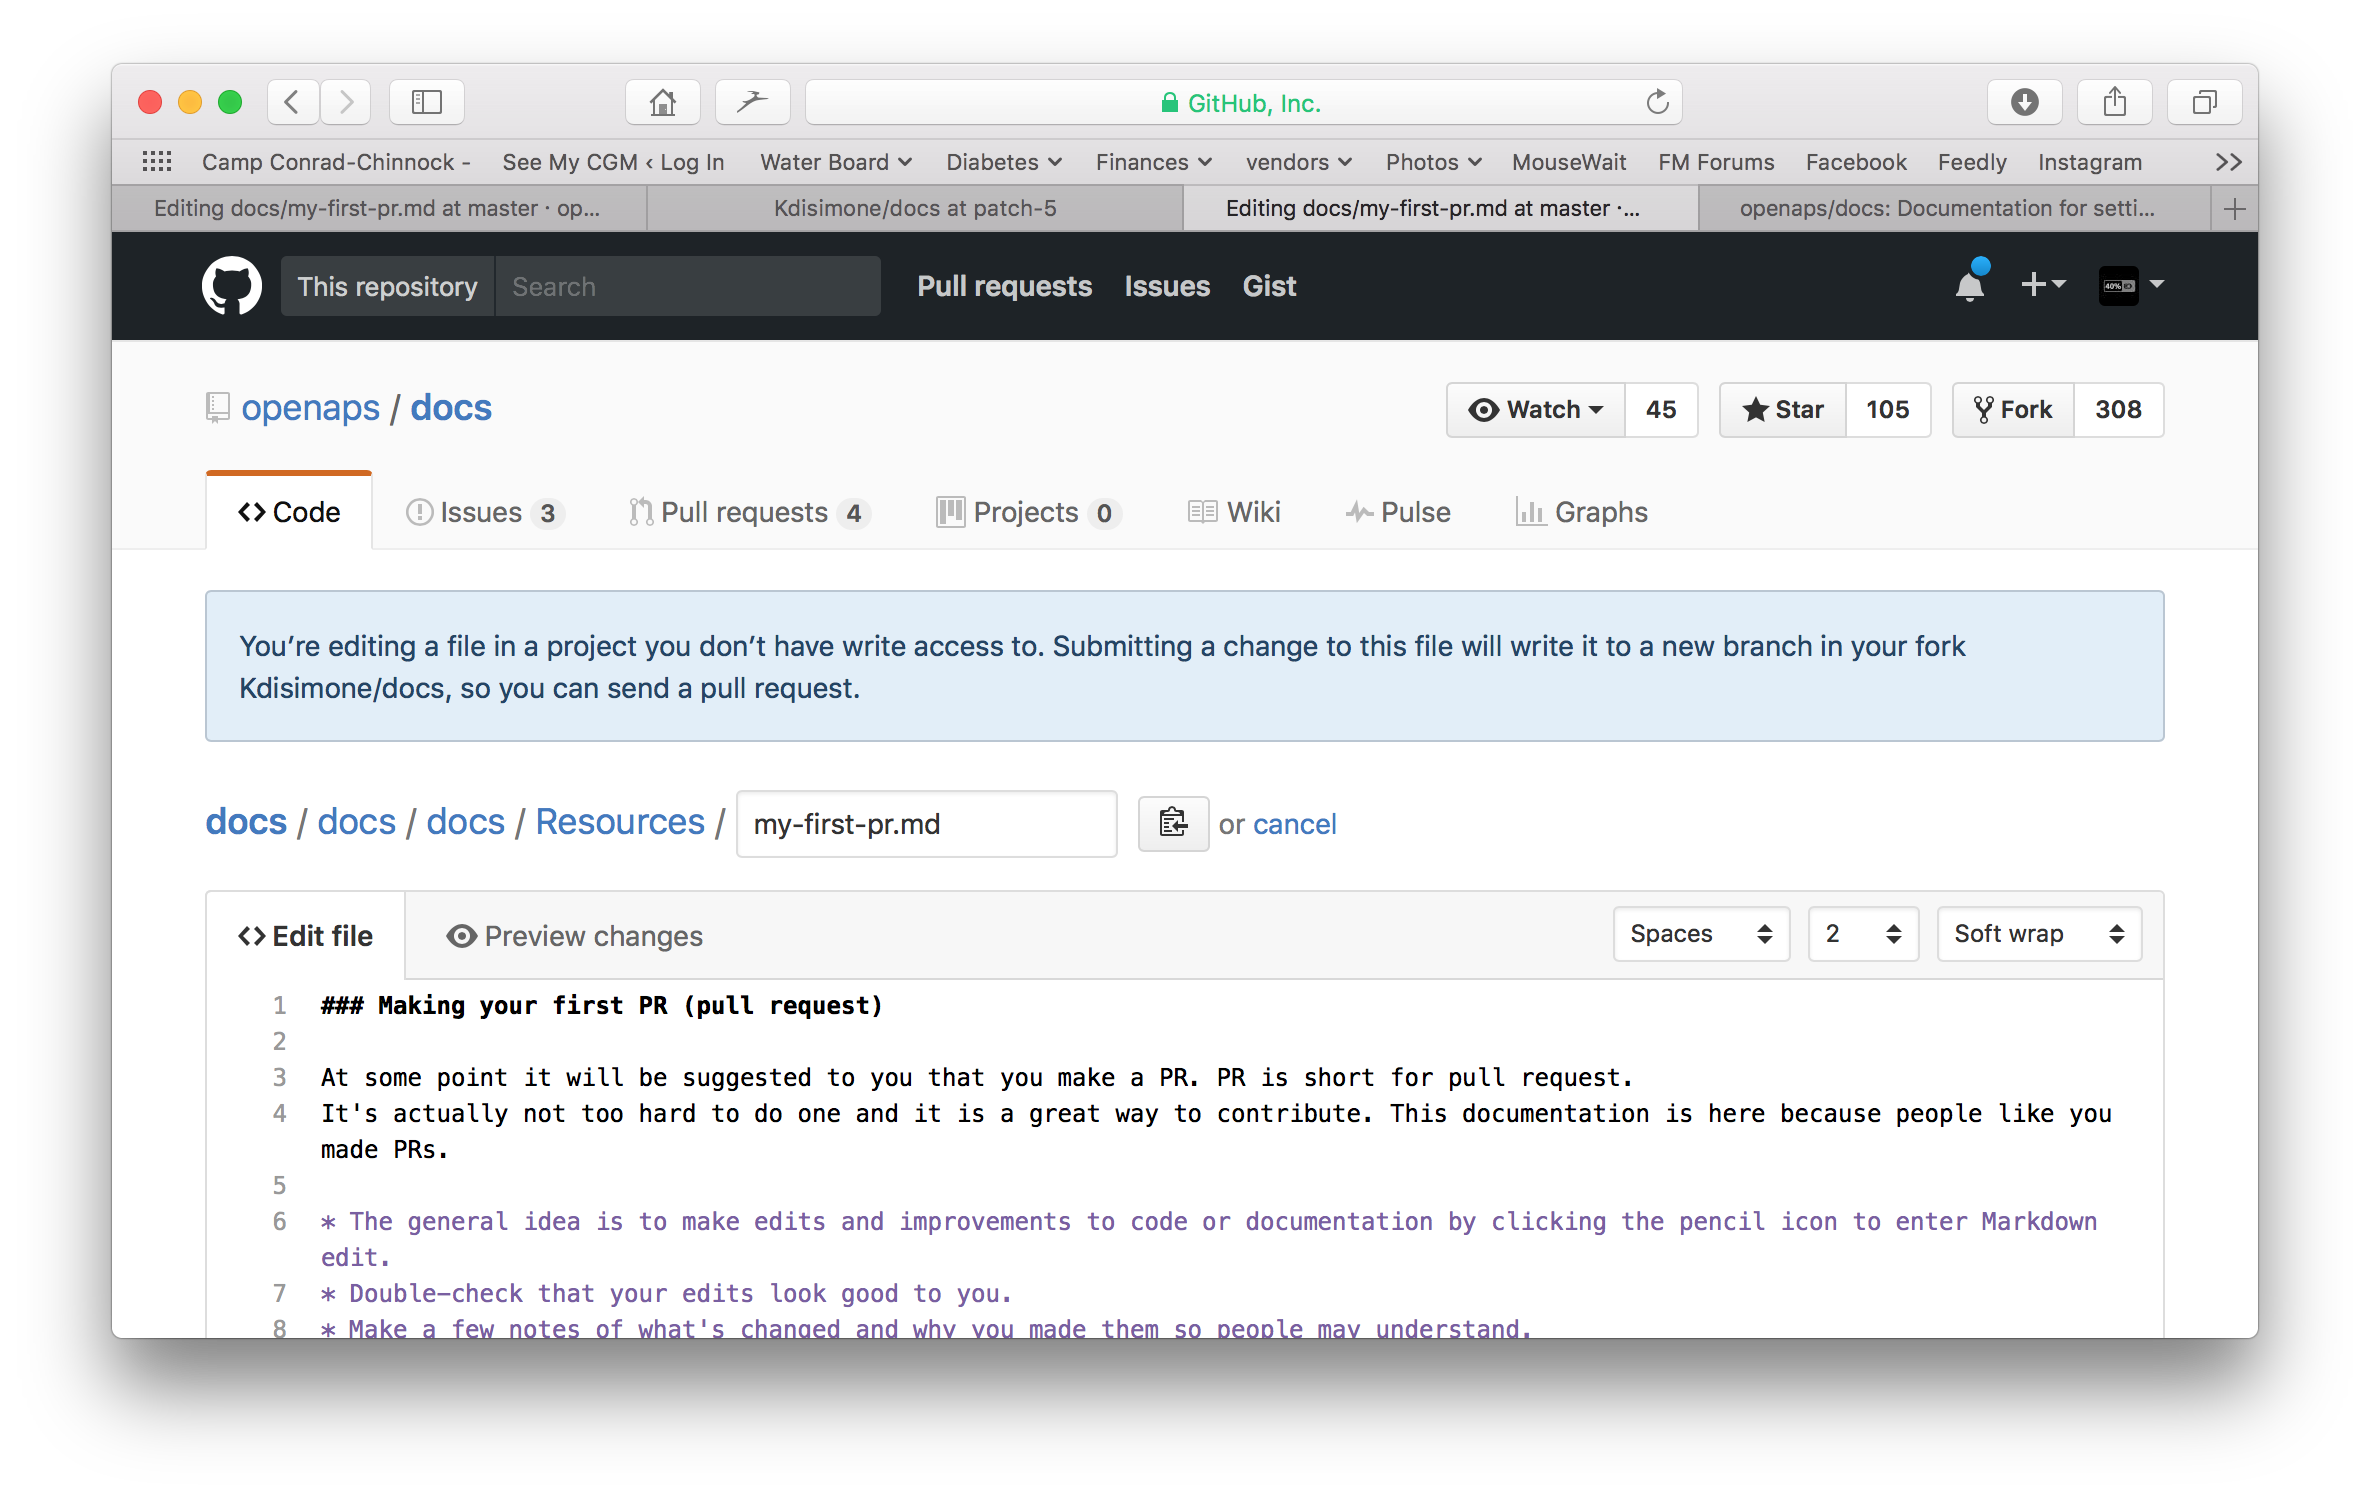
One or the other of the options in Step 2 will create a new branch in YOUR repository where your edits will be saved. Make your edits to the file.
We are using markdown for the docs pages. The file have got the suffix “.md”.The Markdown specification is not fixed and we use at the moment the myst_parser for our markdown files. Take care to use the correct syntax as described below.
“<>Dosyayı düzenle” sekmesinde çalışıyorsunuz. Değiştirdiğiniz her şeyin istediğiniz gibi göründüğünden emin olmak için yeni bir görünüm için “Preview changes” “Değişiklikleri önizle” sekmesini seçin (yazım hataları vs.). Gerekli bir iyileştirme görürseniz, daha fazla iyileştirme yapmak için düzenleme sekmesine geri dönün.
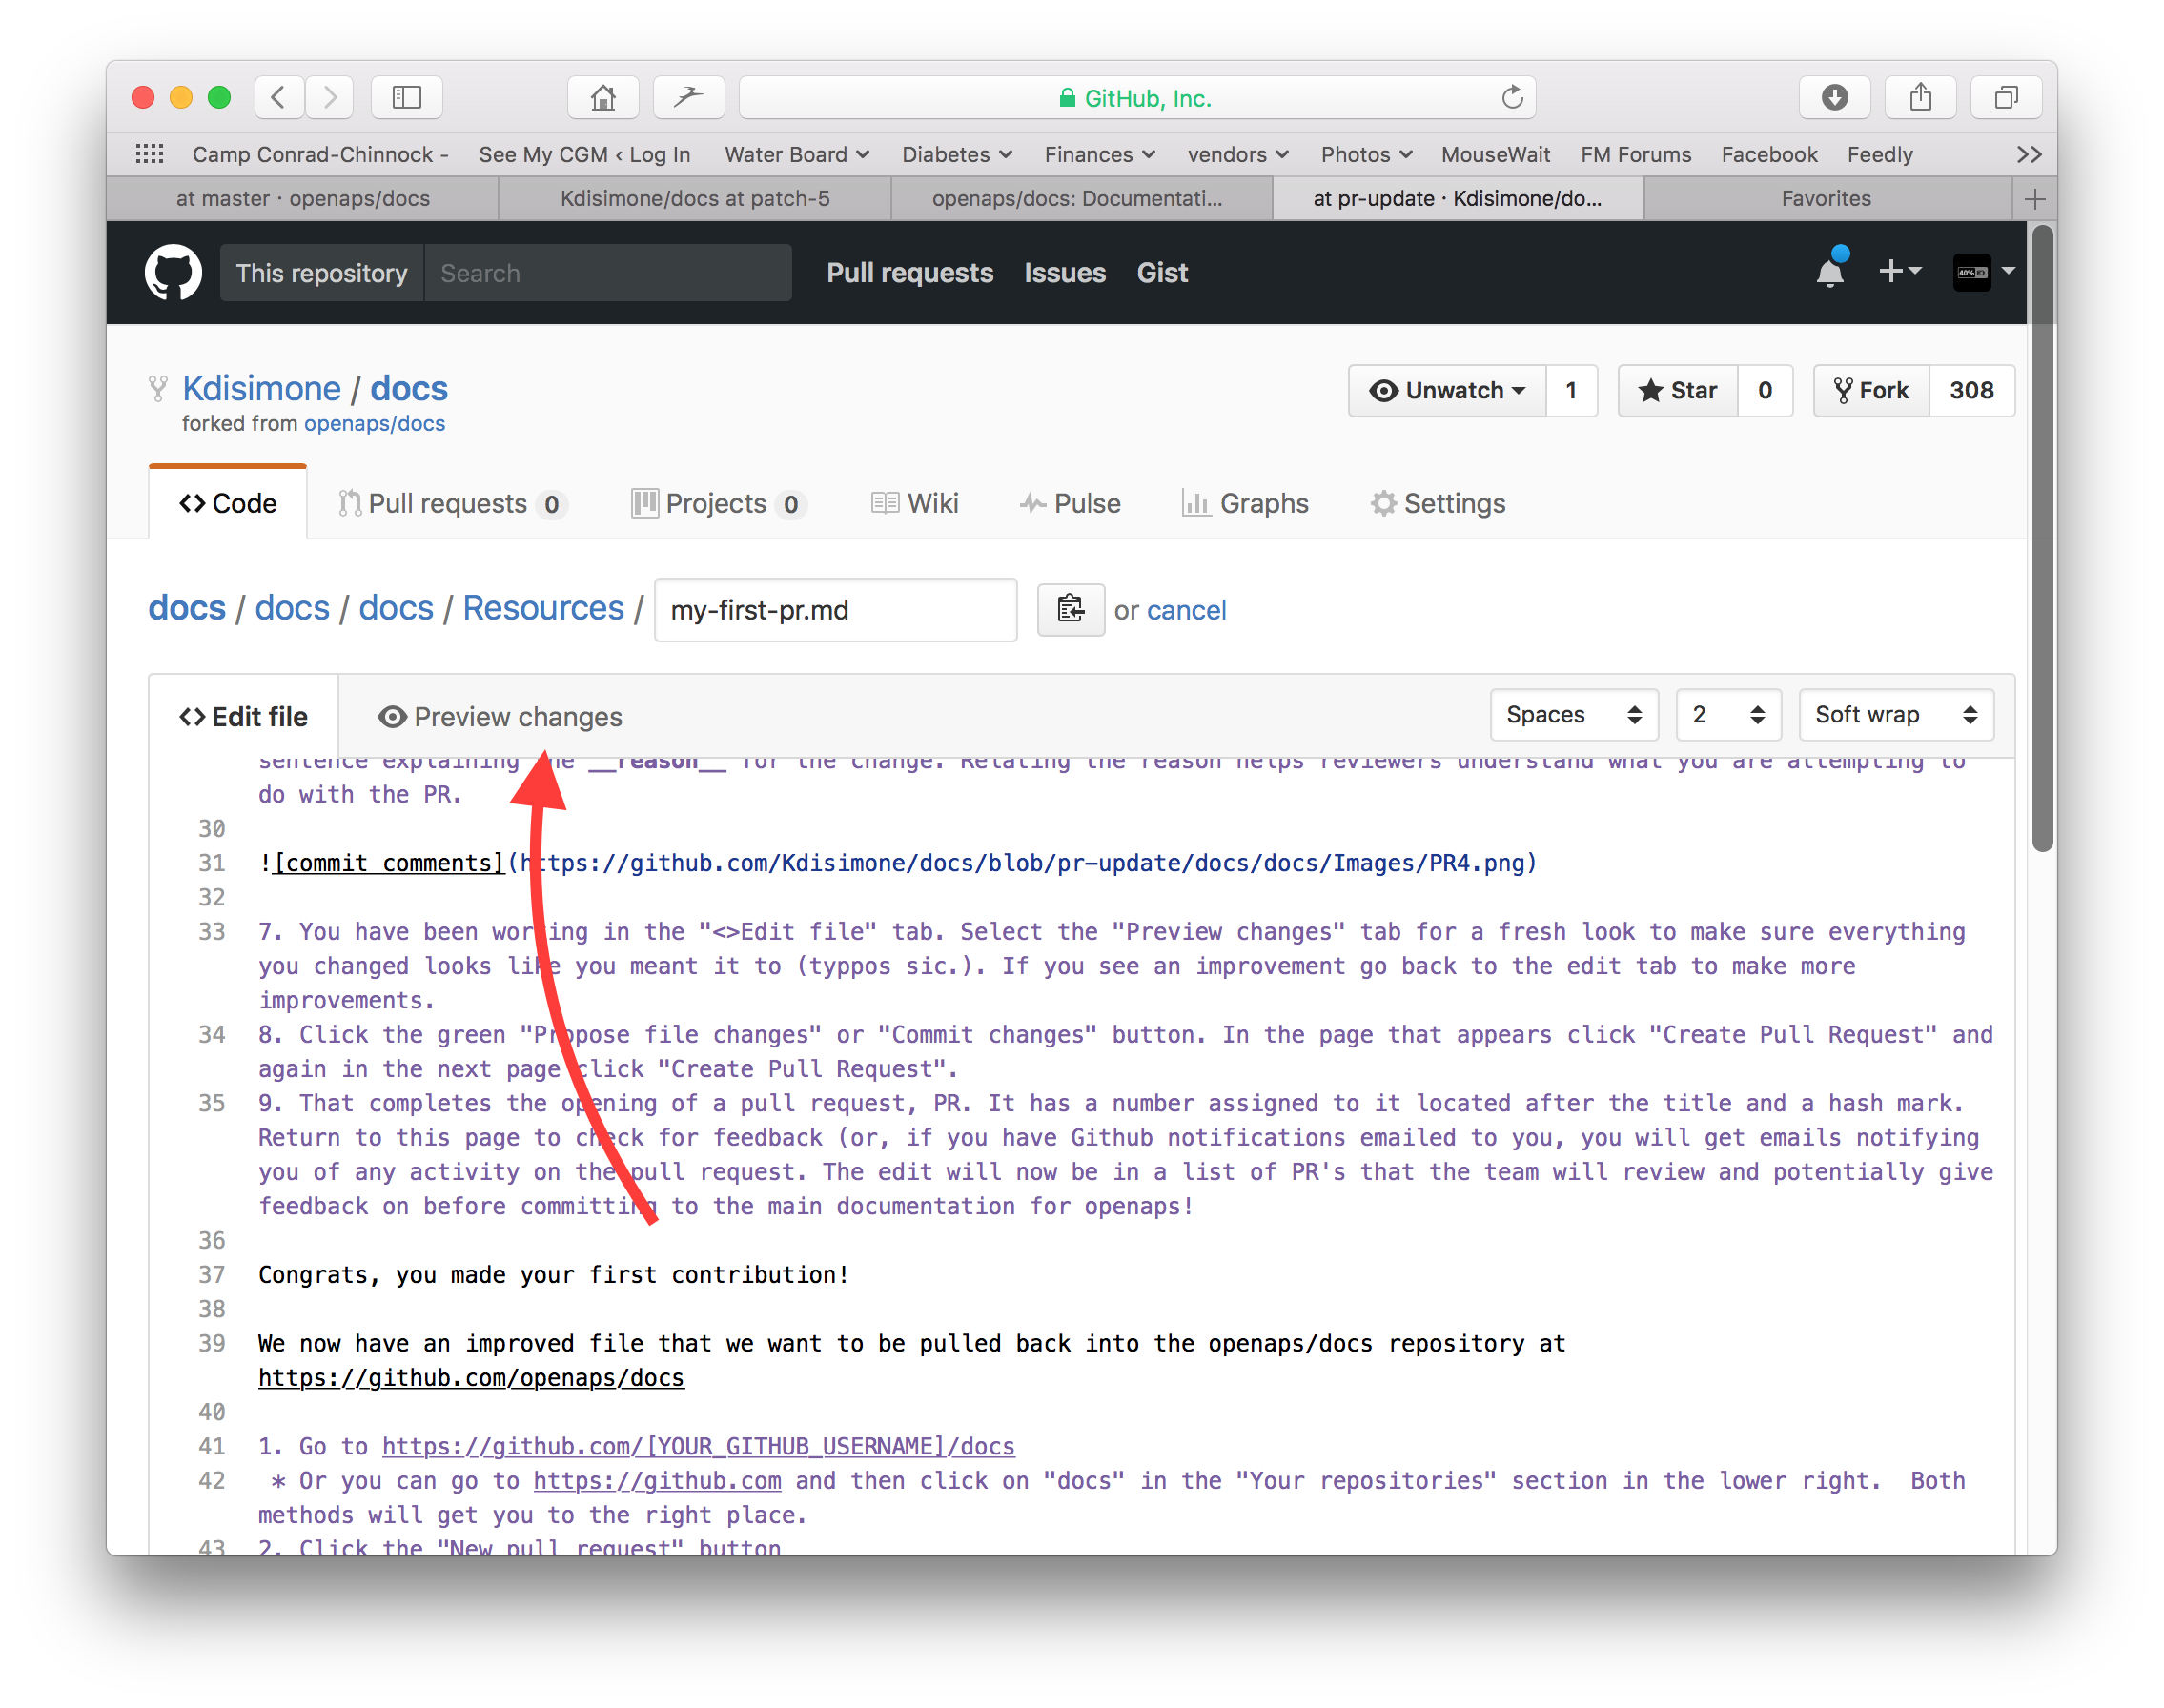
Düzenlemelerinizi bitirdiğinizde, sayfanın en altına gidin. Alttaki kutuda, “İsteğe bağlı bir genişletilmiş açıklama ekleyin…” yazan metin alanına yorumlarınızı girin. Varsayılan başlık dosya adıdır. Değişikliğin nedenini açıklayan bir cümle eklemeye çalışın. Nedeni ilişkilendirmek, gözden geçirenlerin PR ile ne yapmaya çalıştığınızı anlamasına yardımcı olur.
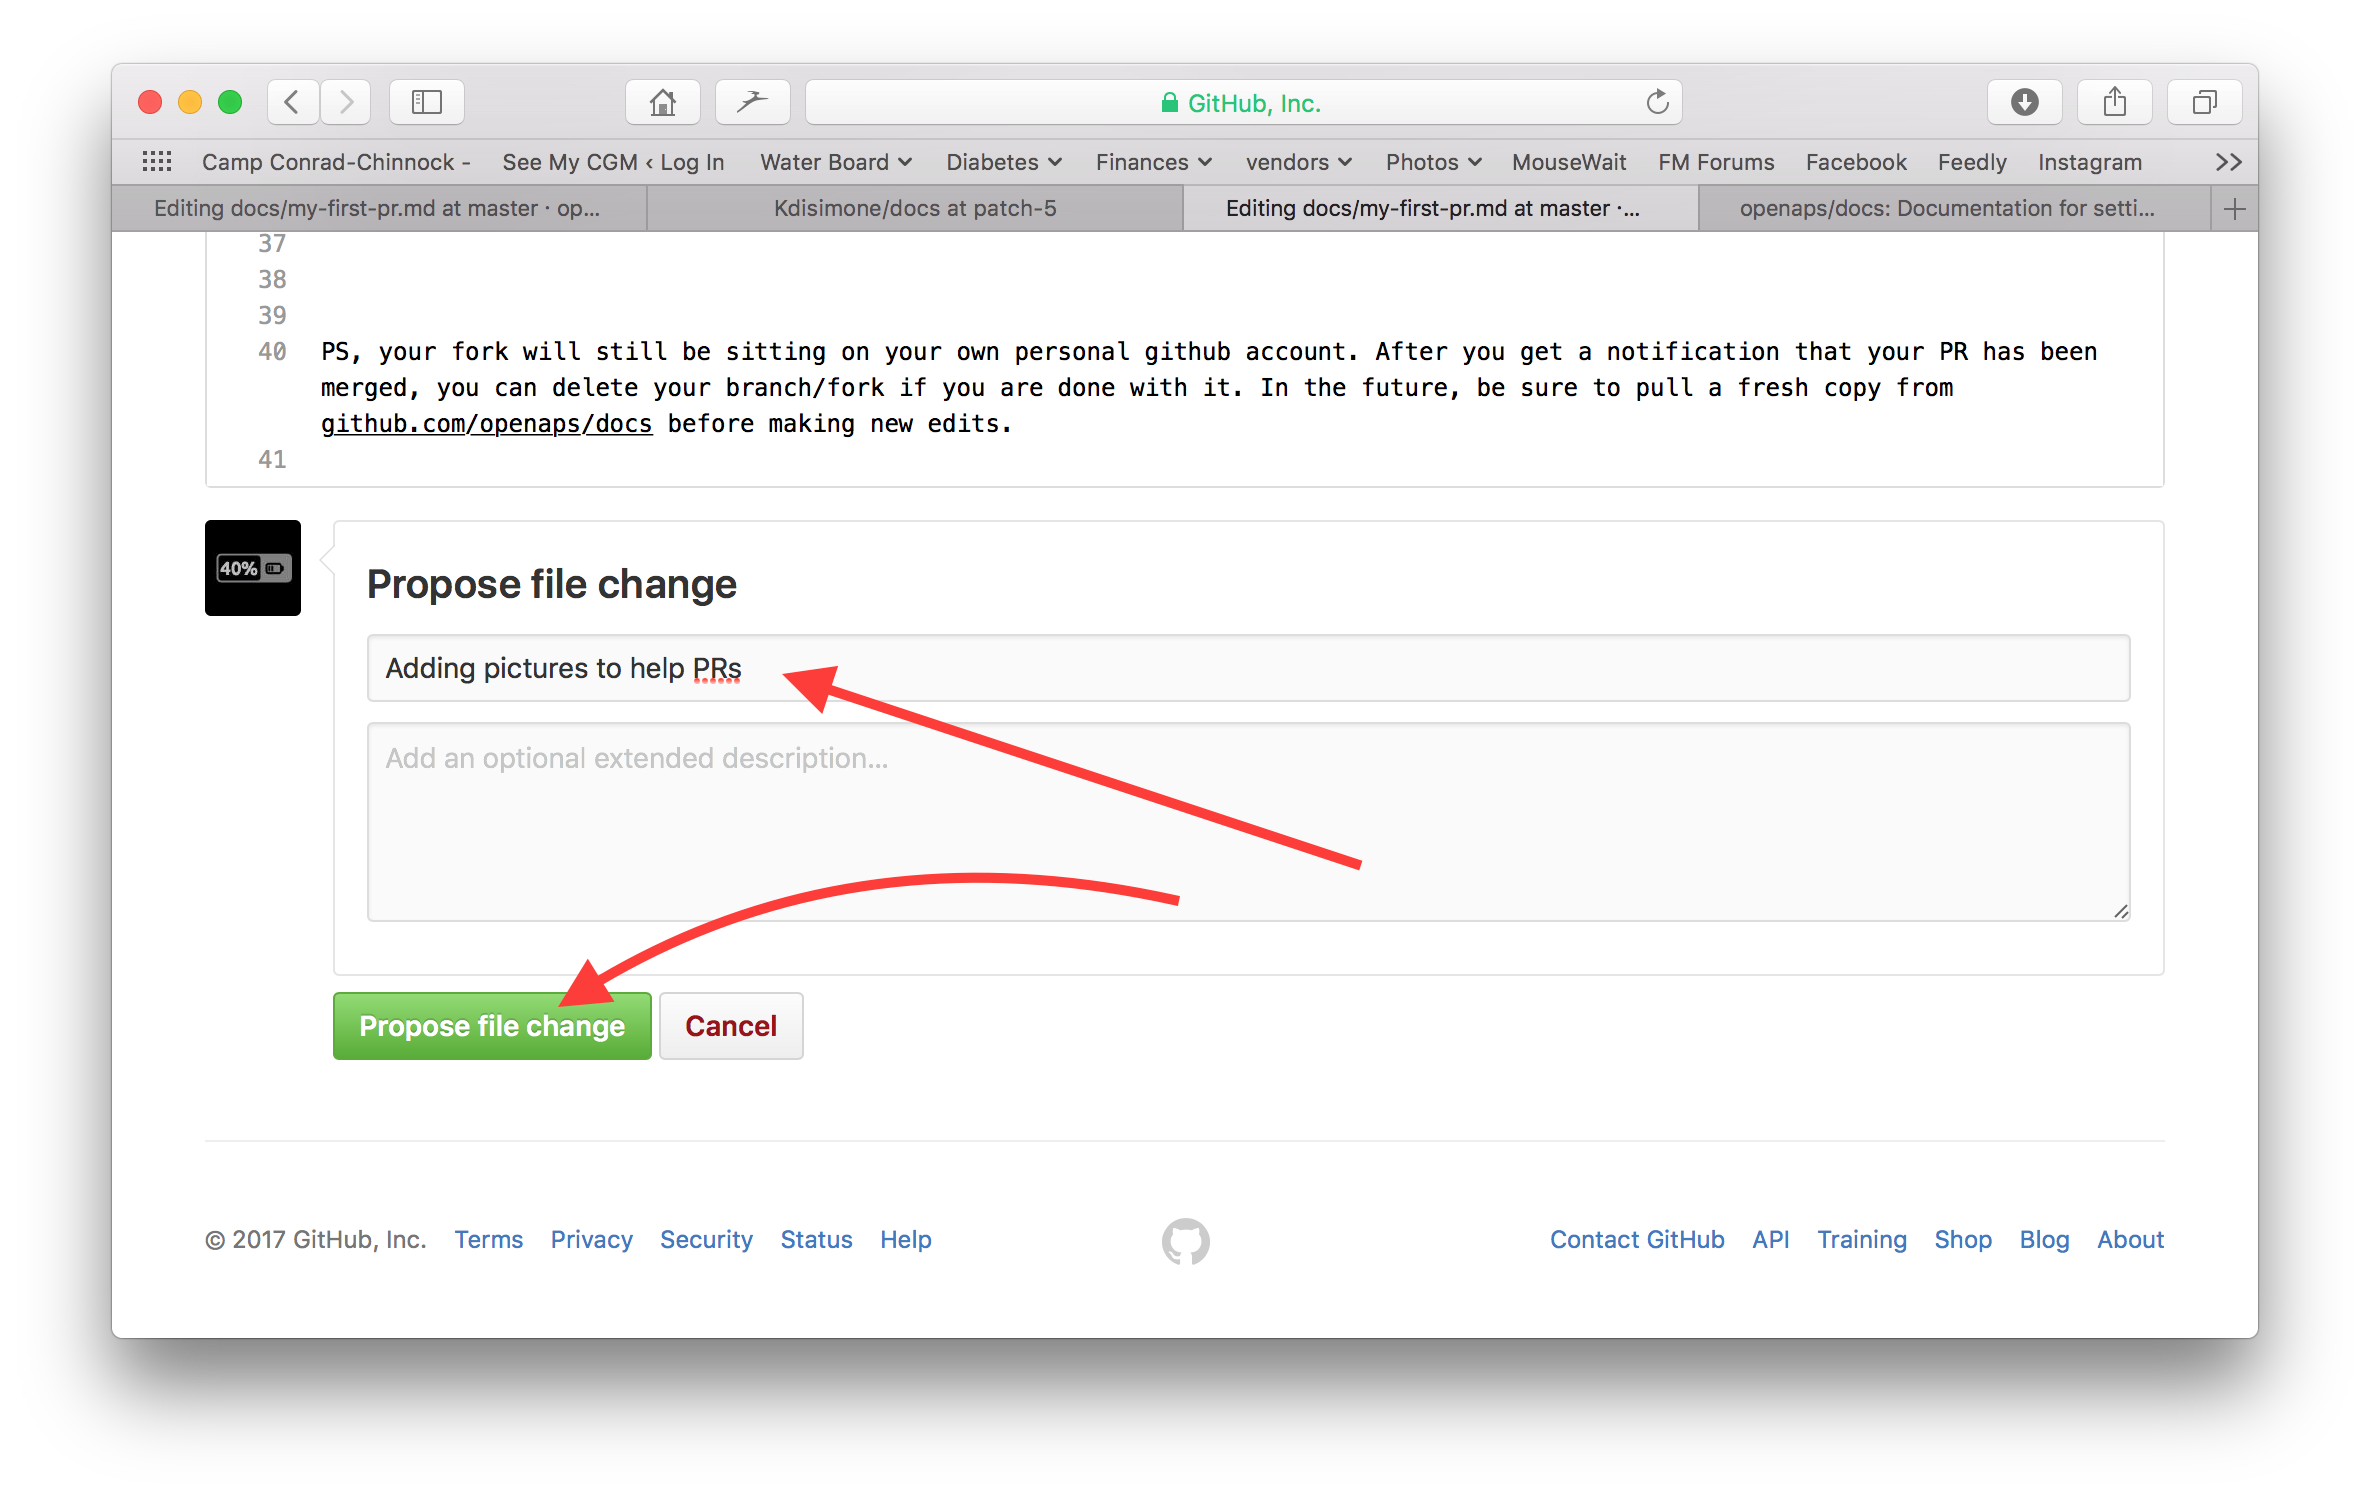
Yeşil “Dosya değişiklikleri öner” veya “Değişiklikleri kabul et” düğmesini tıklayın. Açılan sayfada “Create Pull Request” “Çekme Talebi Oluştur” u tıklayın ve sonraki sayfada tekrar “Çekme Talebi Oluştur” u tıklayın.

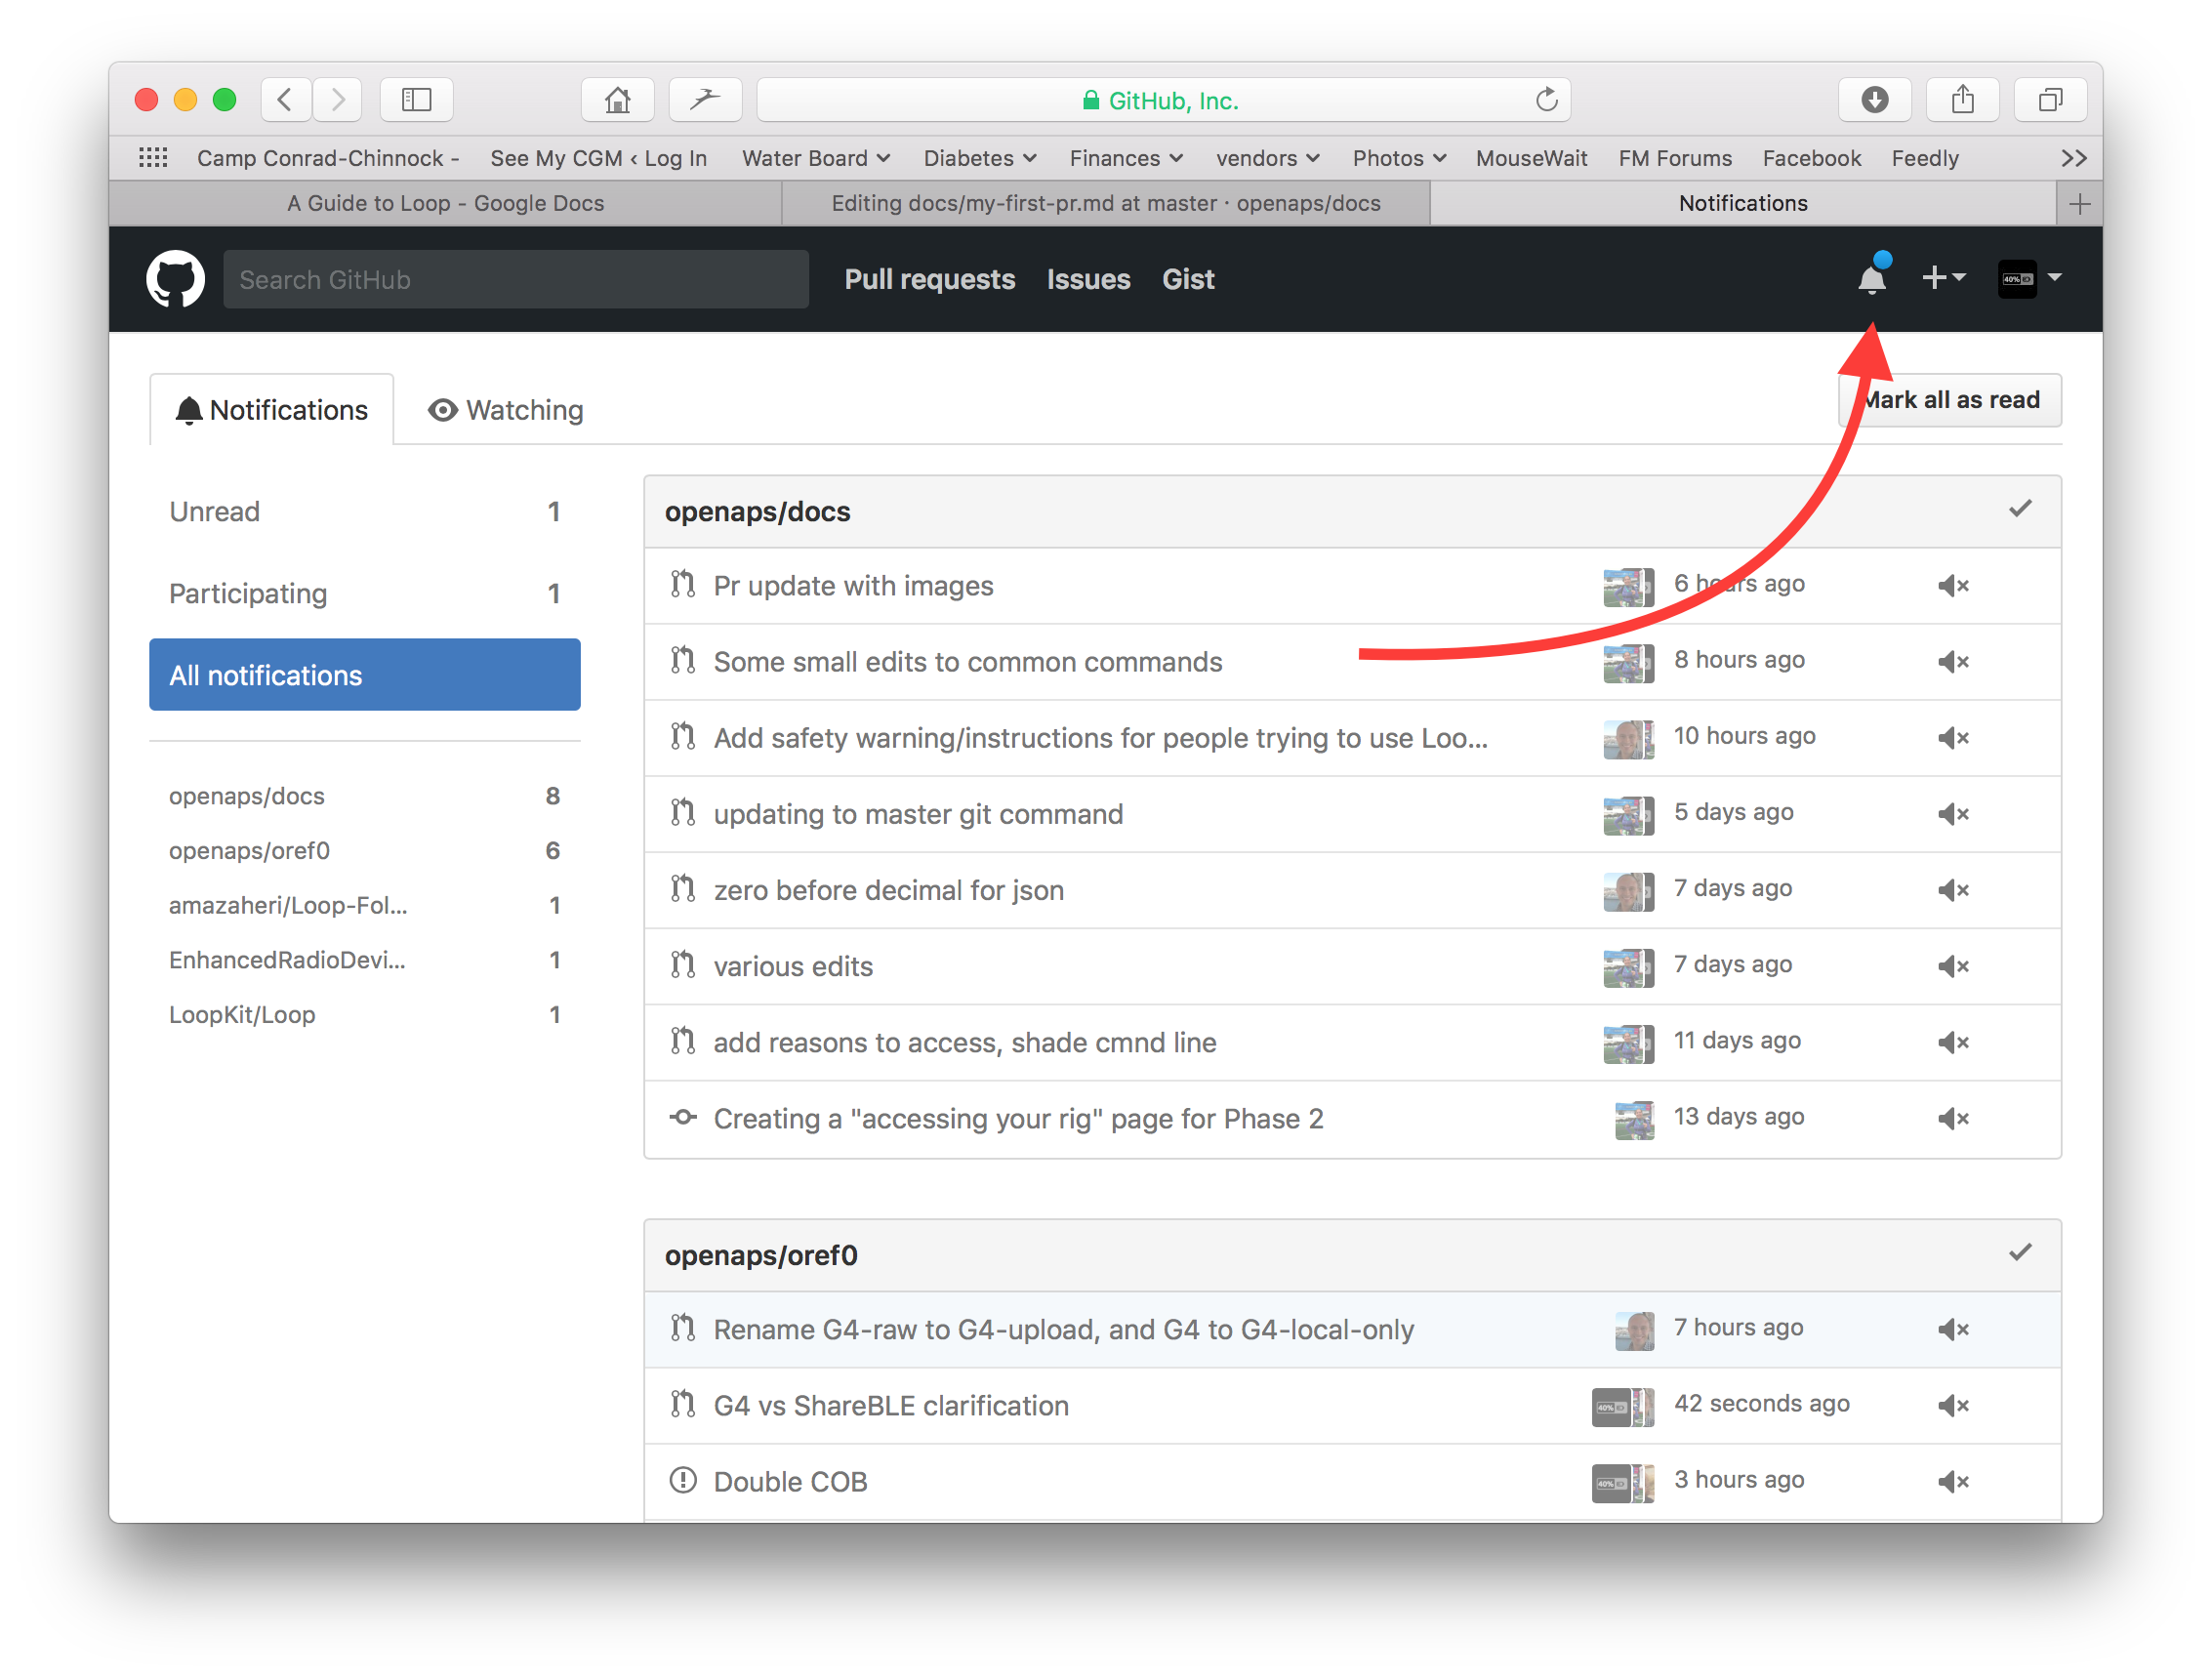
Bu, bir çekme isteğinin (PR) açılmasını tamamlar. GitHub, PR’ye başlıktan sonra bulunan bir sayı ve bir kare işaret atar. Geri bildirimi kontrol etmek için bu sayfaya dönün (veya size e-postayla GitHub bildirimleri gönderildiyse, PR ile ilgili herhangi bir etkinlik hakkında bilgilendiren e-postalar alacaksınız). Düzenleme şimdi, ekibin AndroidAPS için ana belgelere geçmeden önce gözden geçireceği ve potansiyel olarak geri bildirimde bulunacağı bir PR listesinde olacak! PR’nin ilerlemesini kontrol etmek isterseniz, GitHub hesabınızın sağ üst köşesindeki zil logosuna tıklayıp tüm PR’lerinizi görebilirsiniz.
PS: Your fork and branch will still be sitting on your own personal GitHub account. After you get a notification that your PR has been merged, you can delete your branch if you are done with it (Step 8’s notification area will provide a link to delete the branch once it has been closed or merged). For future edits, if you follow this procedure the edits will always start with an updated version of the AndroidAPSdocs repositories. If you choose to use another method to start a PR request (e.g., editing starting from your forked repo’s master branch as the starting point), you will need to ensure your repo is up-to-date by performing a “compare” first and merging in any updates that have happened since you last updated your fork. Since people tend to forget to update their repos, we recommend using the PR process outlined above until you get familiar with performing “compares”.
Sözdizimi kodları
We are using markdown for the docs pages. The files have got the suffix “.md”.
Görüntü boyutu
If using images please use reasonable sizes. Screenshot images should be 250 pixels wide.
Text format
bold:
**text**italic:
*text*Headline 1:
# headlineHeadline 2:
## headlineHeadline 3:
### headline
ordered list
1. first
1. second
1. third
first
second
third
unordered list
- one element
- another element
- and another element
one element
another element
and another element
multi level list
You can insert lists in lists by indenting the nect level with 4 more spaces to the right than the one before.
1. first
1. second
1. third
  1. one element
  1. another element
  1. and another element
1. four
1. five
1. six
first
second
third 1. one element 1. another element 1. and another element
four
five
six
Images
images:

Links
harici bağlantı:
[alt metin](www.url.tld).md sayfasına dahili bağlantı:
[alt metin](../folder/file.md)internal link to headline:
[alt text](../folder/file.html#headline)
Internal links
If you want to set an internal link within the AndroidAPS documentation, please only use relative links. Only this will make the link work in the other languages (Czech, German…) as well.
[text](../Usage/Test.md)will set an internal hyperlink one directory up from where you are and then into the subdirectory /Usage. Ending of the target file must be .md or .rst (not .html)[text](./Usage/Test.md)will set an internal hyperlink from where you are into /Usage. Ending of the target file must be .mdTo set the link to an anchor (i.e. a headline) you let the file extension .md in place!
[text](../Usage/Test.md#anchor)
Notes
:::{admonition} Friendly Note
:class: note

This is a note.
:::
Friendly Note :class: note
This is a note. :::
Warnings
:::{admonition} Strong Warning
:class: warning

This is a warning.
:::
Strong Warning :class: warning
This is a warning. :::
Adding multiple images to the documentation
If you are planning to make a lot of edits, including adding images to help illustrate parts of the documentation (thank you!), you may want to take the following approach:
As you go and save screenshots, rename the screenshots to a descriptive name - but try not to use spaces as that confuses GitHub. Instead, use underscores. I.e. Example_batch_images_upload.png rather than “Example batch images upload.png”.
Please use reasonable sizes. Screenshot images should be 250 pixels wide.
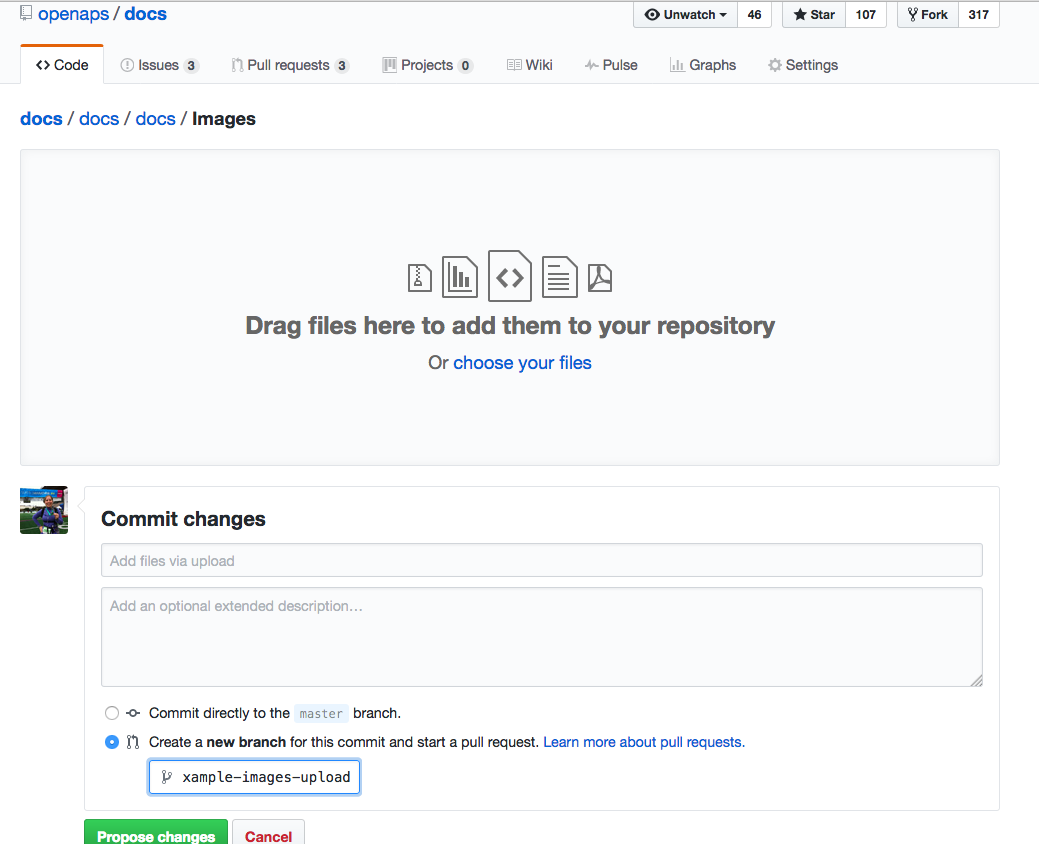
You can upload images in batches easily by:
Navigate to the images folder (https://github.com/openaps/AndroidAPSdocs/tree/master/docs/EN/images - but make sure you are in your fork/copy of the docs Images folder to be able to do this (replace “openaps” in the URL with your GitHub username)).
Click in the upper right corner where it says “Upload files”
Drag and drop your images into the screen
Commit these to your branch
Now, you can look for the URL/relative path of each file and use that to refer to when adding images into a page in the documentation.
To see examples of how to add the images, you can look at the “raw” code of a page to see an example from a page that already has the images embedded successfully. Make sure you use the correct code for the page type you are on (.md or .rst). The main thing is to have a plain text description, followed by a link with a relative path to the image, like this:
For .md pages:
(That code is exactly how the image below is embedded to be displayed.)For .rst pages:
.. image:: ../images/Example_batch_images_upload.png
:alt: Example of uploading images in batches
After adding images or making adjustments, you can submit a PR to the master branch of AndroidAPSdocs.