Freestyle Libre 3
The Freestyle Libre 3 system can automatically report dangerous blood glucose levels. The Libre3 sensor sends the current blood glucose value to a receiver (reader or smartphone) every minute. The receiver triggers an alarm if necessary. With the help of the Juggluco app, the sensor can be taken over after the start and connected to Xdrip+, AndroidAPS or Libreview. In this way, the blood sugar values can be transmitted directly. It is even possible to receive historical data from the sensor’s memory (two hours of minutely glucose and two weeks of once per 5 minute historical data) to be sent to Juggluco.
The sensor can be calibrated in the range of -40 mg/dl to +20 mg/dl (-2.2 mmol/l to +1.1 mmol/l) to compensate for differences between the bloody reading and the sensor readings.
Current restrictions
If you have a rooted system, you have to hide it. You can find instructions here: Link.
(There are several apps to find out if the smartphone is rooted, one of them is e.g. root-checker.org)
The Juggluco app only supports English, Dutch and Italian languages.
Step 1: Download and set up the Libre3 app
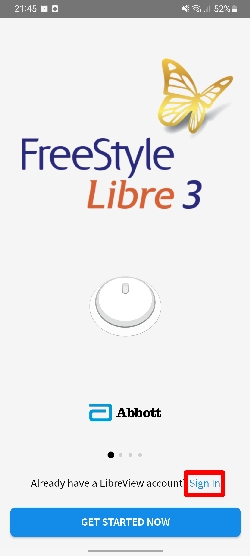
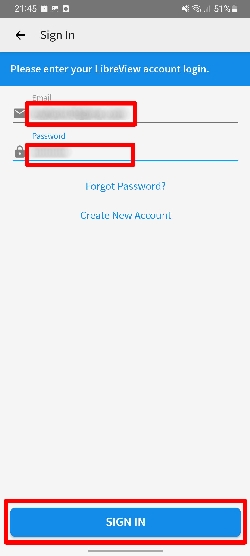
Install the Libre 3 app from the Playstore and open it. On the home screen, click Sign In. Registration with your Libreview account is mandatory - if you don’t have one yet, you can create one.
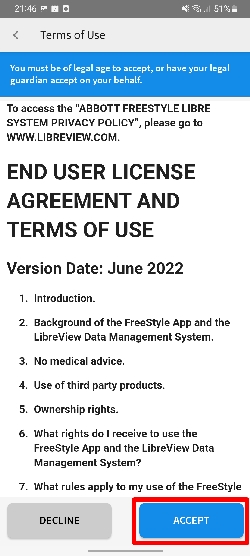
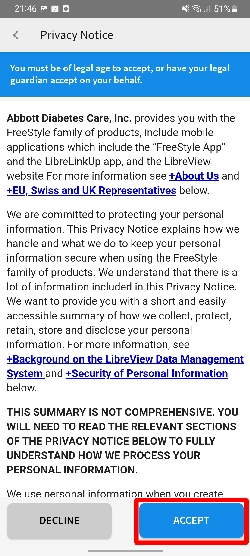
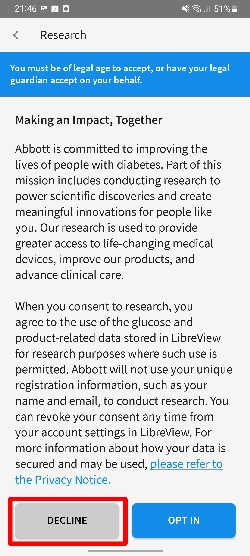
You must then accept Abbott’s Terms of Service. The last one is optional and can also be rejected.
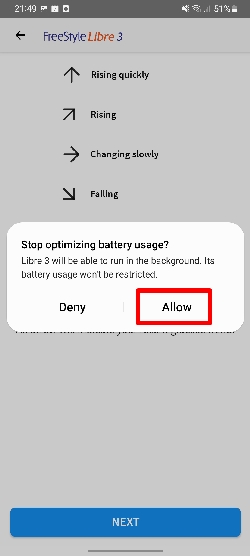
Adjust the app step by step according to your needs. If you see this message about disabling battery optimization, tap «Allow».
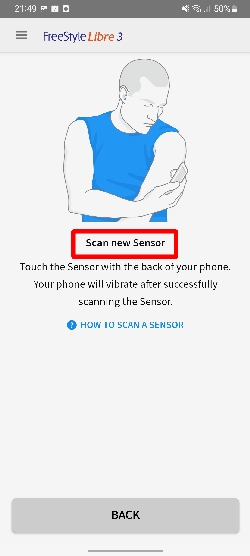
After setting up the Libre 3 app, you can already activate your first sensor. To do this, scan the sensor as shown and wait for the sensor to warm up within the next 60 minutes.
Step 2: Stop Libre 3 app
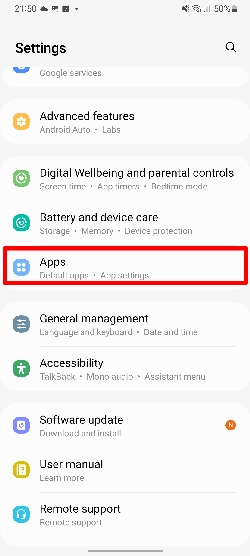
After the sensor has started successfully and the first sensor reading is visible, you can continue. Now open the settings and select the menu option for «Apps».
You then search for the Libre 3 app. Once you have found it, tap on it.

Now tap «Stop» or «Force stop». The exact button may vary depending on the Android version.
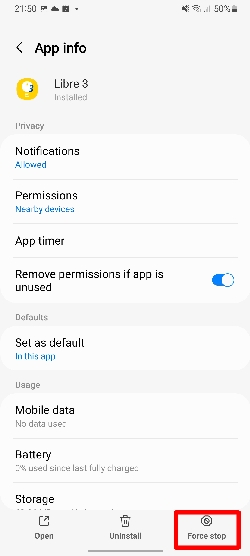
If there is another request, you can confirm it with «OK».

Step 3: Install & set up Juggluco
Now install the Juggluco App from the Playstore (version 4.0.1 or higher). With the help of this app, the blood sugar readings can be sent directly to Xdrip and AndroidAPS. For this purpose, the active sensor (which is registered on Libreview) is used within Juggluco. This also explains why a Libreview account is mandatory.
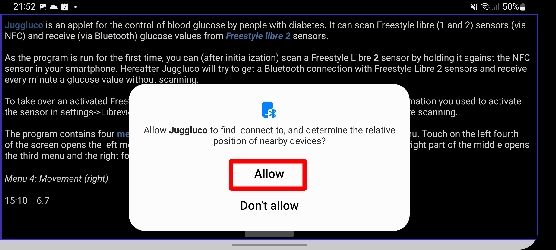
After installing Juggluco, several messages may appear. Allow Juggluco to find, locate and connect nearby devices.
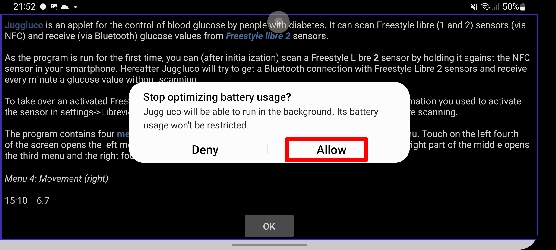
A request to deactivate the battery optimization may appear as well. Tap «Allow». This is important to keep the app running in the background.
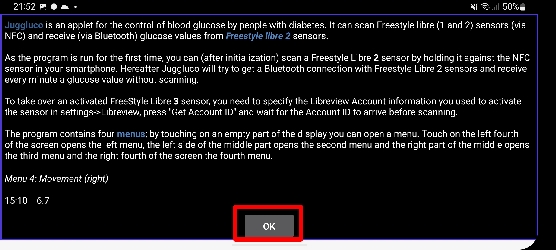
Tap OK when Juggluco is introduced.
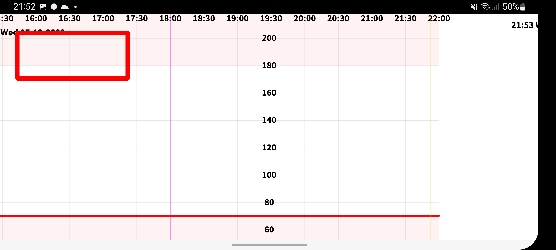
Now you will see the Juggluco home screen. Click onto the empty space within the upper left half. You can see the approximate position here.
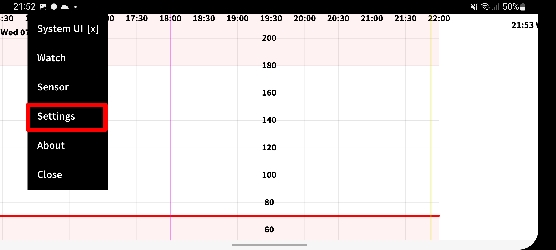
This menu will open. Here you can select «Settings».
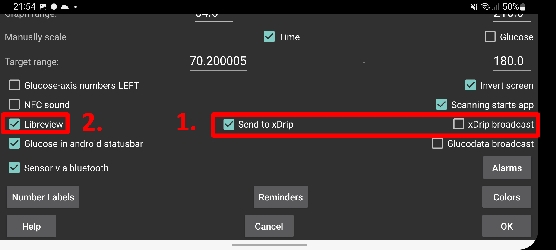
This page will then show up. In the selection «1.» you have two options:
«Send to xDrip» -> With this setting, the blood sugar readings are sent to xDrip. Select «Libre2 patched» or «Libre 2 (patched app)» as the recipient within xDrip.
«xDrip broadcast» -> With this setting, the minutely blood sugar reading are sent directly to AndroidAPS. The blood glucose source must be set to «xDrip+» within AndroidAPS.
To start the sensor, choose «2.» the «Libreview» checkbox.
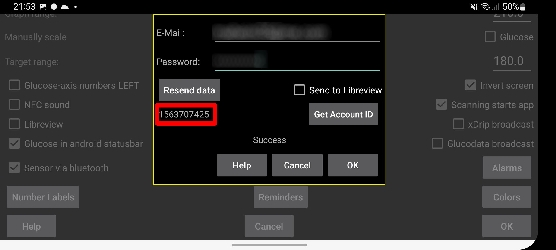
In the next screen you have to enter your login data for Libreview. It must be the account with which the sensor was activated. Then click on «Get Account ID».
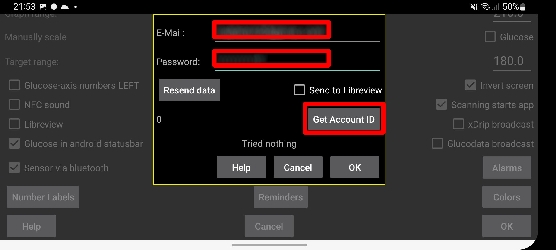
If everything went well, a multi-digit number should now be visible below the «Resend data» button. This process may take some time - if the number still doesn’t appear, check your internet connection and try the previous steps again.
Note: If you want to upload blood sugar readings to Libreview, you can check the «Send to Libreview» checkbox.
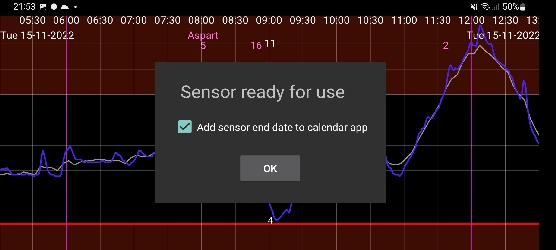
Now it’s time to restart the sensor! Go back to the Juggluco home screen and scan your previously activated sensor. The sensor will start and may enter a 60 minute warm-up period again. After the 60 minutes, the readings should be visible on the Juggluco home screen.
Done, that’s it! If the readings are not visible, you can find more information in the «Experiences and troubleshooting» section.
Step 4: Set up xDrip
Los valores de azúcar en sangre son recibidos en el smartphone por la aplicación xDrip+.
If not already set up then download xDrip+ app and install one of the latest nightly builds from here.
In xDrip+ select «Libre2 patched» or «Libre 2 (patched app)» as data source
disable battery optimization and allow background activity for xDrip+ app
If necessary, enter «BgReading:d,xdrip libre_receiver:v» under Less Common Settings->Extra Logging Settings->Extra tags for logging. Esto registrará mensajes de error adicionales ante problemas.
In xDrip+ go to Settings -> Interapp Compatibility -> Broadcast Data Locally and select ON.
In xDrip+ go to Settings -> Interapp Compatibility -> Accept Treatments and select OFF.
to enable AAPS to receive blood sugar levels (version 2.5.x and later) from xDrip+ please set Settings -> Interapp Settings -> Identify Receiver «info.nightscout.androidaps».
If you want to be able to use AndroidAPS to calibrate then in xDrip+ go to Settings -> Interapp Compatibility -> Accept Calibrations and select ON. You may also want to review the options in Settings -> Less Common Settings -> Advanced Calibration Settings.

Step 5: Start sensor within xDrip
En xDrip+ inicie el sensor con «Iniciar Sensor» y «hoy no». It is not necessary to hold the mobile phone onto the sensor. In fact «Start Sensor» will not physically start any Libre 3 sensor or interact with them in any case. Esto es simplemente para indicar xDrip+ que un nuevo sensor está dando niveles de azúcar en la sangre. Si es posible, introduce dos valores medidos en sangre para la calibración inicial. Ahora los valores de glucosa deben mostrarse en xDrip+ cada 5 minutos. Skipped values, e.g. because you were too far away from your phone, will not be backfilled.
Wait at least 15-20 minutes if there is still no data.
After a sensor change xDrip+ will automatically detect the new sensor and will delete all calibration data. You may check you bloody BG after activation and make a new initial calibration.
Step 6: Configure AndroidAPS
In AndroidAPS go to Config Builder -> BG Source and check «xDrip+»
If AndroidAPS does not receive BG values when phone is in airplane mode, use «Identify receiver»
Until now, using Libre 3 as BG source you cannot activate “Enable SMB always” and “Enable SMB after carbs” within SMB algorithm. The BG values of Libre 3 are not smooth enough to use it safely.
Switch back to the Libre app from Juggluco
It is possible to switch back from Juggluco to the Libre 3 app as receiver. The following steps are necessary:
Reinstall Libre 3 app (Or clear data in settings)
Set up the Libre 3 app with the Libreview account with which the sensor was activated.
Stop the Juggluco app in the settings, similar to the Libre 3 app in the instructions.
In the Libre 3 menu, click «Start Sensor», select «Yes», «Next» and scan your sensor.
The 60-minute warm-up phase should then begin. This is necessary after every change and cannot be skipped.
Experiences and Troubleshooting
Necessary settings for a successful sensor start
NFC enabled / BT enabled
Storage and location permission enabled
Location service enabled
Automatic time and time zone setting
Tenga en cuenta que el servicio de ubicación es imprescindible. It is not about the location permission of the app, which must be set as well!
Troubleshooting Libre3 no readings
Android location service is not granted - please enable it in the system settings
automatic time and time zone not set - please change the settings accordingly
Bluetooth is switched off - please switch on¨
Make sure the Libre 3 sensor is not connected to any other device.
Troubleshooting Juggluco no readings
Check if the Libre 3 app is stopped.
Rescan the Libre 3 sensor within the Juggluco app
Make sure the sensor has been activated with the current Libreview account
Check if a sensor number is visible in Juggluco
The sensor is usually connected to the smartphone within 3 minutes, but it can also take longer.
If the Bluetooth connection cannot be established, try restarting the smartphone.
Make sure the Libre 3 sensor is not connected to any other device.
Troubleshooting Blood sugar readings not uploading to Libreview
Check your internet connection
Make sure Juggluco is receiving blood sugar readings
Ensure the «Send to Libreview» checkbox is checked within Juggluco->Settings->Libreview
Further help
Original instructions: jkaltes website
Additional Github repo: Github link