Сборка через браузер
Сборка AAPS с использованием инструментов GitHub.
Минимальная поддерживаемая версия AAPS - 3.3.2.1.
Постройте сами вместо скачивания
The AAPS app (an apk file) is not available for download, due to regulations around medical devices. Построить приложение для собственного использования вполне законно, но передавать копию другим не разрешается!
See FAQ page for details.
Технические характеристики устройства и программного обеспечения для построения AAPS
Рекомендуется использовать устройства на базе Android. Компьютер или устройство на базе iOS тоже можно использовать.
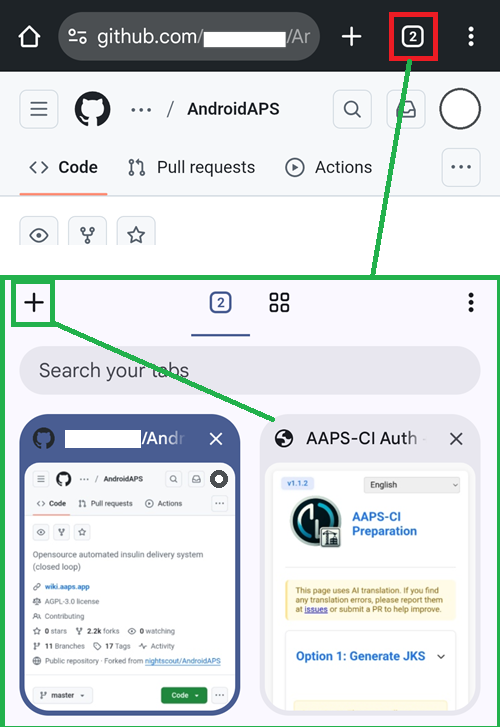
Вам будет необходимо использовать несколько вкладок браузера и переключаться между ними. Например, в Chrome:
Также необходима учетная запись Google, чтобы сохранить свою сборку на гугл-диске.
Примечание
Эта документация предполагает, что вы используете свой смартфон и браузер Chrome.
Вам придется переходить между вкладками: перед началом сборки закройте все открытые вкладки, чтобы не потеряться в процессе.
1. Своя ветка с AAPS
В GitHub вам необходимо держать в тайне свои личные ключи Android Java Key и Google Drive (позже мы объясним, как).
Так как это не может быть сделано внутри публичного репозитория AndroidAPS, вам нужно сделать вашу личную копию исходного кода (называемого веткой или форком).
Учетная запись GitHub
Вам необходимо создать учетную запись GitHub, если у вас ее еще нет.
Вы можете авторизоваться с помощью вашего e-mail’a или с попощью Google-акканута. Следуйте подсказкам при регистрации и верификации.
После того, как вы создадите учетную запись, авторизуйтесь в GitHub.
Ветка AndroidAPS
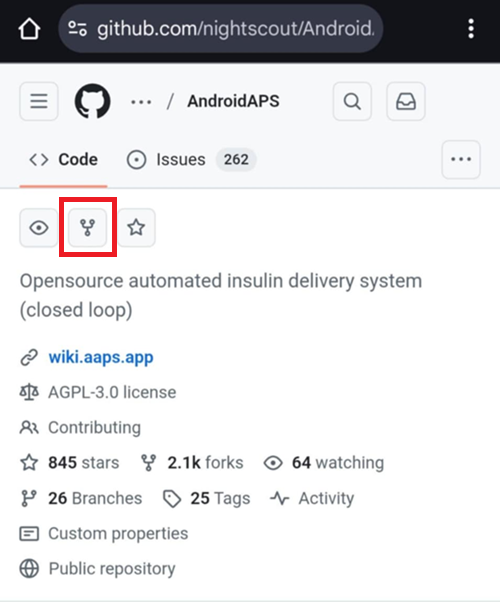
Откройте официальный репозиторий AndroidAPS с помощью этой ссылки.
Нажмите на иконку ветки. Это создаст копию репозитория в вашем аккаунте.
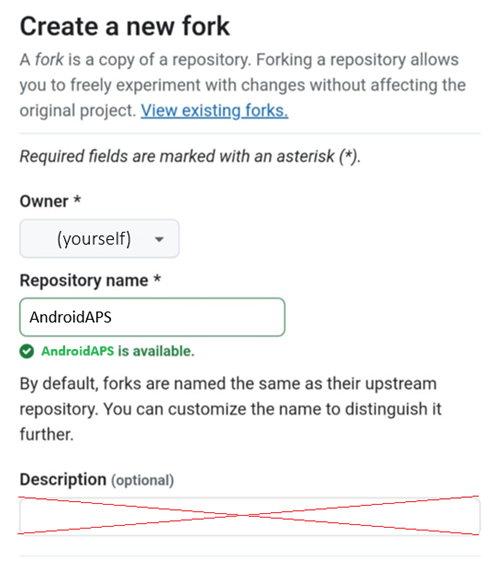
Прокрутите вниз до следующего экрана и нажмите Создать Ветку (Create Fork).
Примечание: вы можете снять галку «Copy the main branch only» (Копировать только основную ветку), если вы хотите собрать версию, находящуюся в разработке, или кастомизированную версию.

Примечание
Вы не можете создать ветку и видите это?
Create a new fork
A fork is a copy of a repository. Forking a repository allows you to freely experiment with changes without affecting the original project. View existing forks.
Required fields are marked with an asterisk (*).
No available destinations to fork this repository.
Это означает, что у вас уже есть ветка AndroidAPS.
Убедитесь, что она актуальная и переходите к Подготовительным шагам.
Предупреждение
Никогда не удаляйте свою ветку без резервного копирования ваших паролей и секретов!
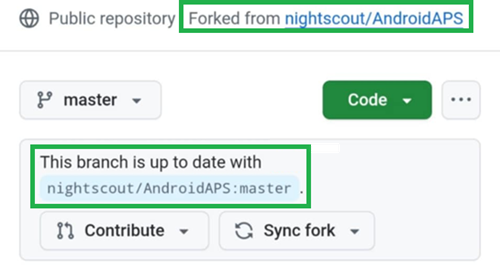
Теперь GitHub отображает вашу персональную копию AndroidAPS. Оставить эту вкладку браузера открытой.
2. Подготовительные шаги
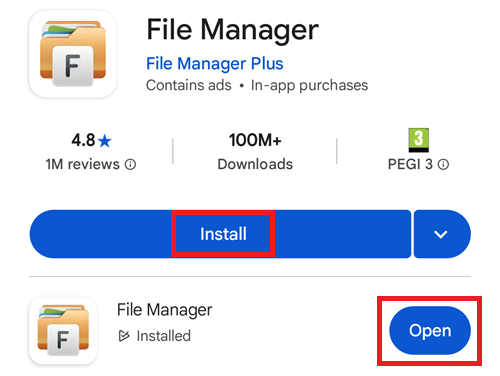
Если вы используете устройство на базе Android, установите File Manager Plus из магазина Google Play.
File Manager Plus
Install File Manager Plus from the Google Play store.
The app is necessary for the preliminary phase and you can safely delete it from your phone once you’ve successfully build and installed AAPS.
Check this is the correct app and tap Install, then Open.
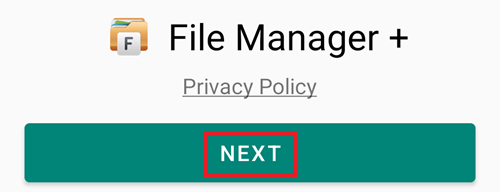
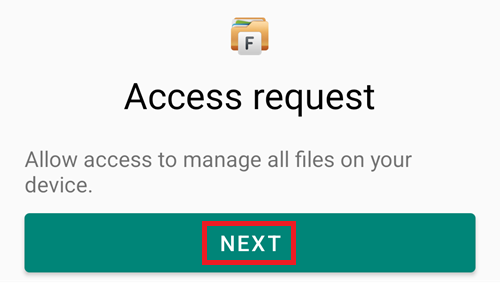
Tap Next to accept the Privacy Policy.
Tap Next to allow the app to access the phone files.
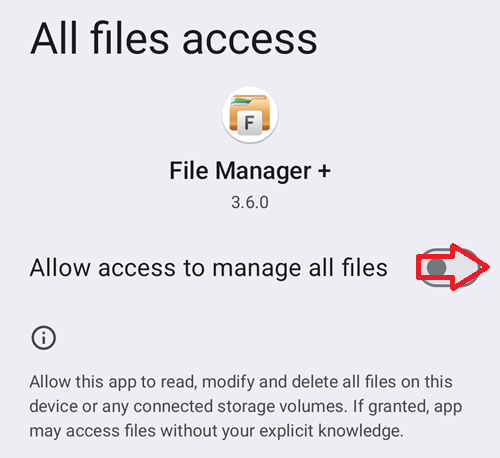
Switch to enable access to all files.
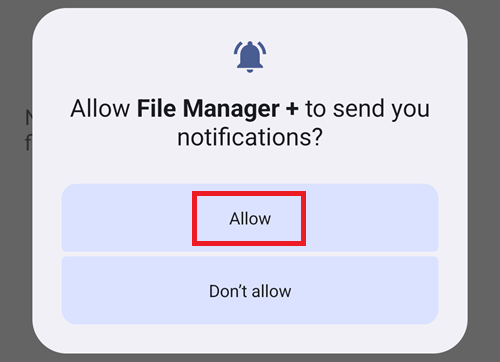
Allow File Manager + notifications.
Consent to profiling.

Загрузите файл подготовки отсюда: aaps-ci-preparation.html
Note
Если вы открываете эту страницу из приложения (через веб-просмотр), файл HTML может не загрузиться. Скопируйте URL и откройте его в вашем браузере: ``text https://github.com/nightscout/aaps-ci-preparation/releases/download/release-v1.2/aaps-ci-preparation.html
Или перейдите к странице со свежим релизом:
```text
https://github. om/nightscout/aaps-ci-preparation/releases/latest
Резервный файл, размещенный на этом сайте:
Если внешняя ссылка также недоступна, вы можете использовать этот резервный файл для загрузки.
Для сборки AndroidAPS требуются закрытые ключи, которые хранятся в хранилище ключей Java (Java KeyStore, JKS):
Если вы собираете AAPS впервые (или у вас нет Android Studio JKS) - следуйте инструкциям по ссылке AAPS-CI Вариант 1 – Генерация JKS для завершения установки.
Предупреждение
Сборка AAPS с помощью Варианта 1 не позволит обновить уже имеющийся у вас AAPS. Вам будет необходимо:
Экспортировать настройки на ваш телефон.
Скопировать или загрузить файл настроек из телефона во внешнее хранилище (например: компьютер, облачный сервис хранения данных).
Создать новую версию подписанного apk, как описано во Варианте 1, и перенести ее на ваш телефон.
Удалить предыдущую версию AAPS.
Установить новую версию AAPS на телефон.
Импортировать настройки для восстановления ваших целей и конфигурации.
Восстановить ваши данные из Nightscout’a.
Если вы хотите использовать свой собственный JKS (тот, который вы использовали для сборки предыдущей версии AAPS на компьютере в Android Studio), вы знаете его пароль и псевдоним (key0) - выберите AAPS-CI Вариант 2 – Загрузить Имеющийся JKS.
После сборки приложение AAPS будет сохранено на вашем Google диске.
AAPS-CI Вариант 1 – Генерация JKS
Подходит тех, кто собирает приложение впервые, или не имеет JKS, или забыл пароль и/или псевдоним.
Ниже приведены примеры для разных платформ.
Выберите ниже вашу платформу: Android (предпочтительный вариант), iOS или компьютер.
Compatible with Android (The simplest, recommended as the first choice)
Open the CI preparation help file
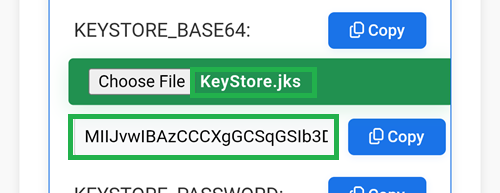
With File Manager+, open the file aaps-ci-preparation-html you downloaded above.
Select Downloads.

And search for this file, tap it to open it, open it with Chrome, tap Just once.
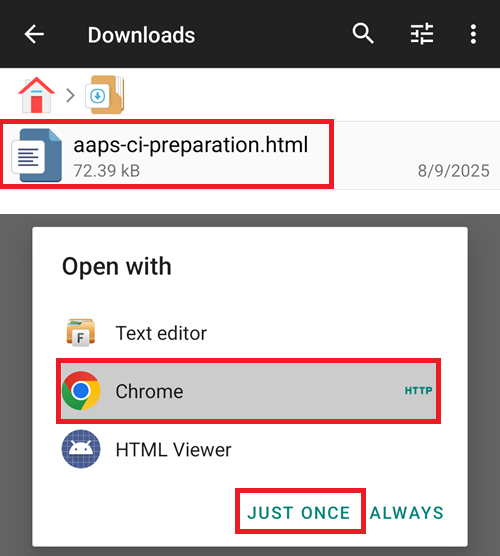
It will open like this.
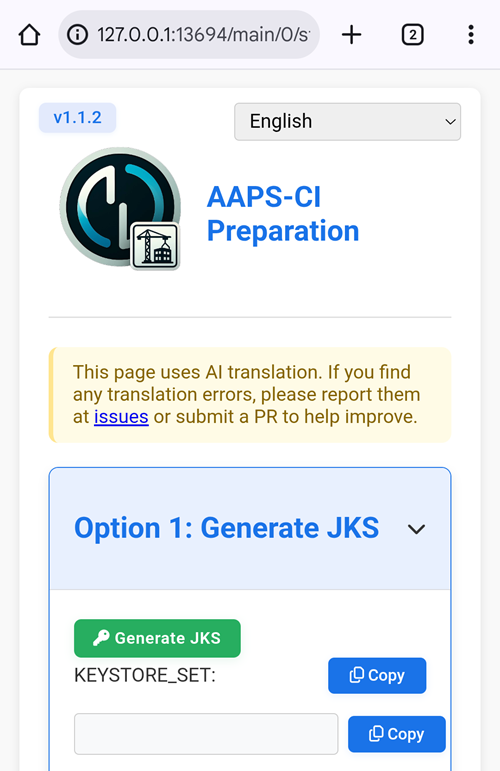
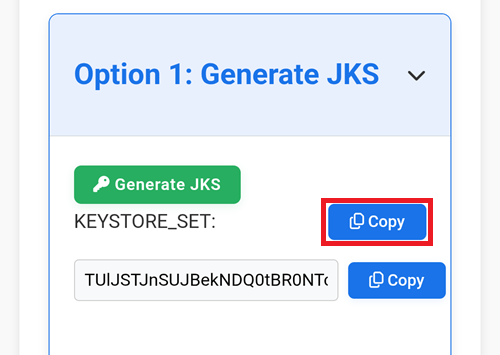
Select Generate JKS. The field below will populate with characters.

Keep this tab open.
Create a new secret in GitHub
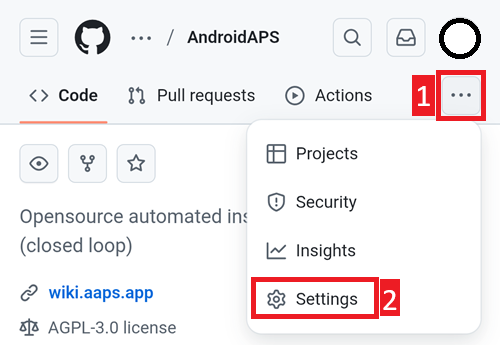
Return to your GitHub browser tab: your own AndroidAPS copy.
Top right, tap the
...buttonSelect Settings in the list
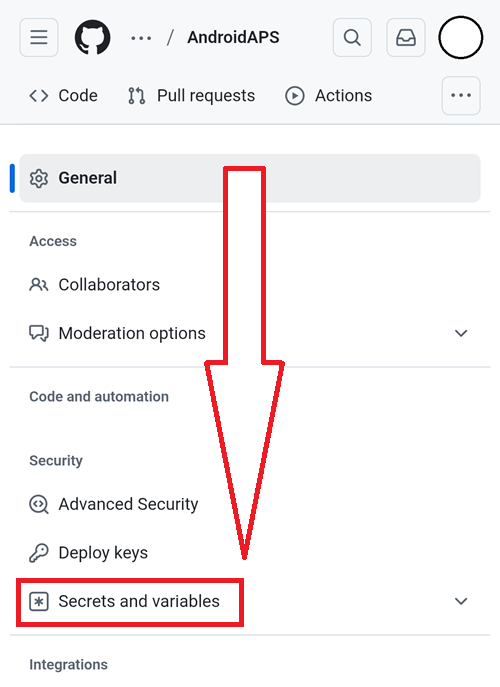
Scroll down to Security and select Secrets and variables.
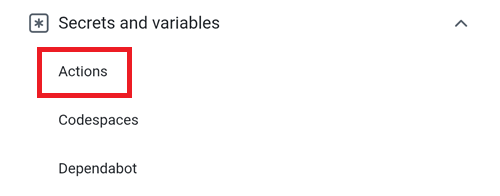
Now select Actions
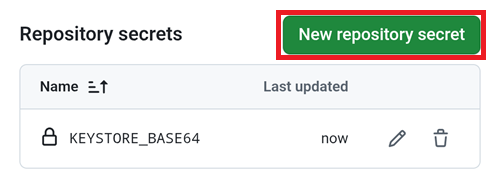
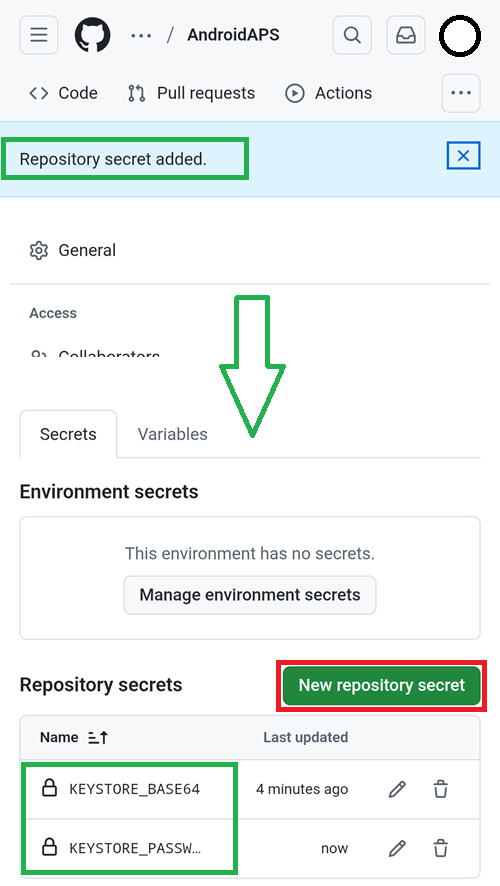
Scroll down to Repository secrets and tap New repository secret
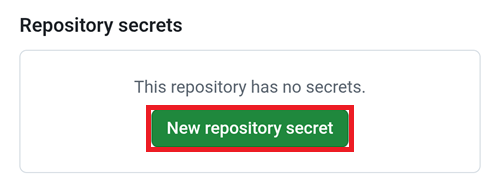
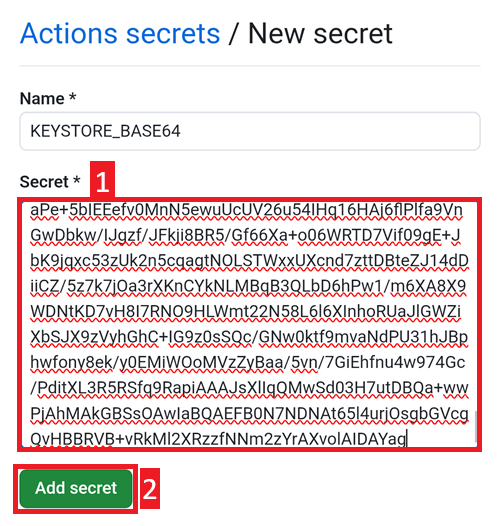
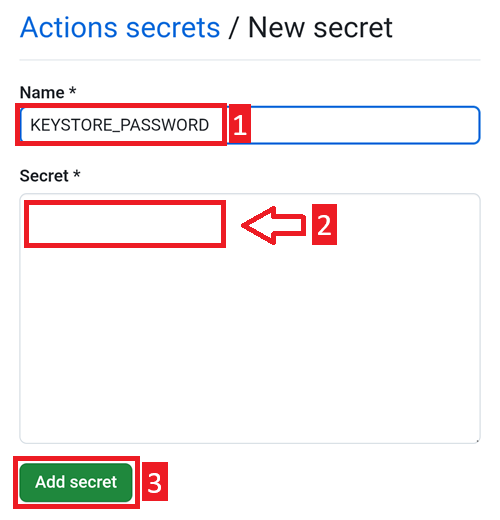
You will see this dialog (scroll down if it’s not visible).
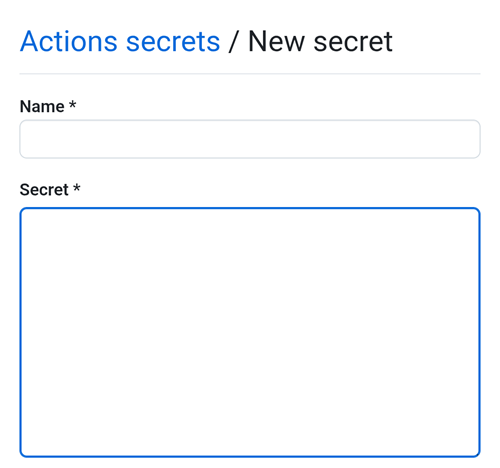
Leave the tab opened like this.
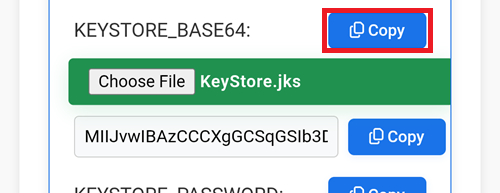
Switch to the File Explorer Plus tab.
Tap the top Copy button.
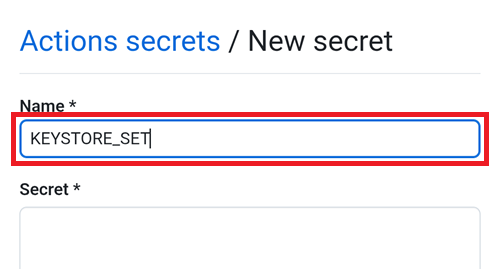
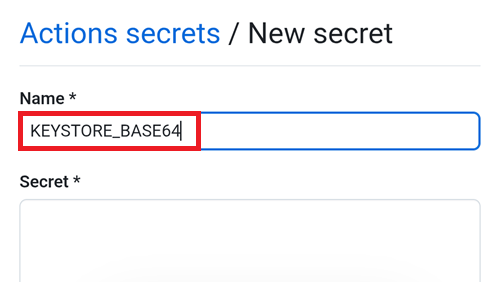
Switch back to the GitHub tab.
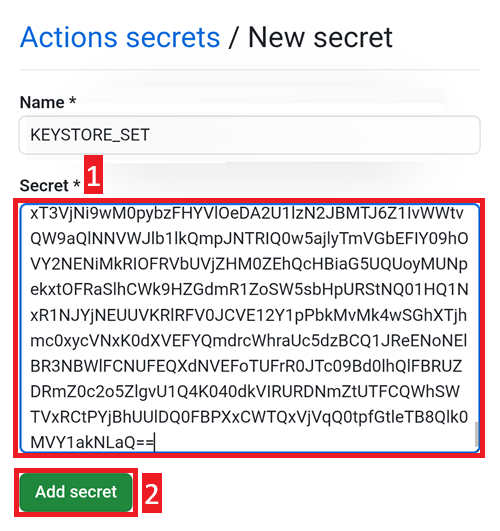
In the Name field, paste the text you just copied. Use a long touch on the text box to show the paste menu.
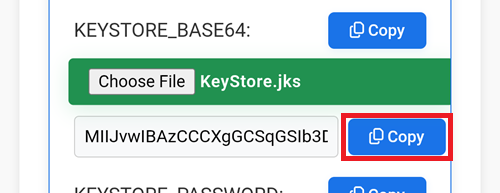
Switch to the File Explorer Plus tab.
Tap the second Copy button.

Switch back to the GitHub tab.
In the Secret field, paste the text you just copied. Use a long touch on the text box to show the paste menu.
Tap Add secret.
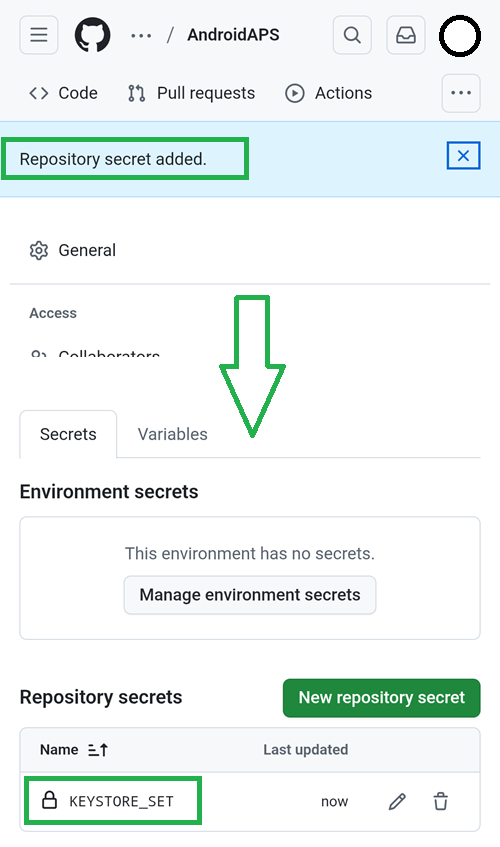
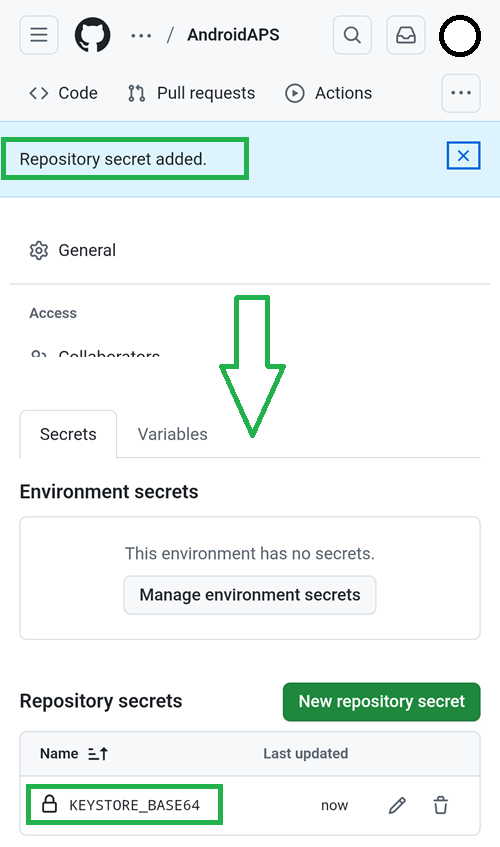
Check the secret has been added, scroll down to verify.
Compatible with iOS (using iPad as an example)
Use a computer (supports Windows/Mac/Linux)
Open the webpage https://simplewebserver.org/download.html
Install Simple HTTP Server If you are a Windows/Mac user, you can install it from the store. After clicking the link, you will be asked whether to allow opening it. Please choose Open Link. 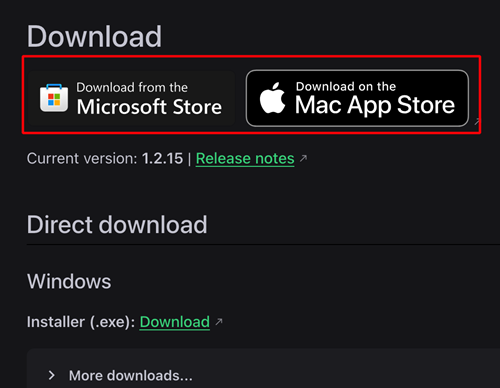
Example on Mac:
get → install → open
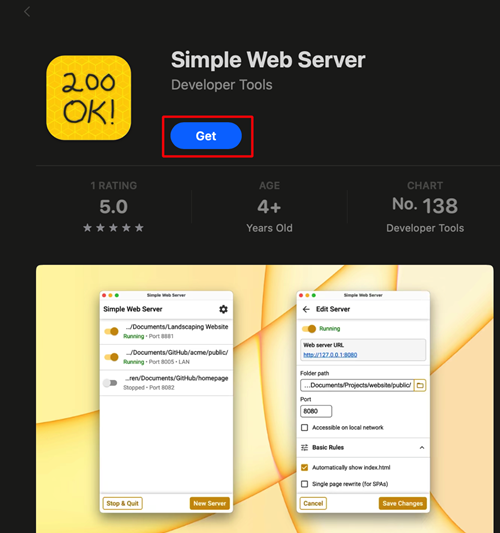
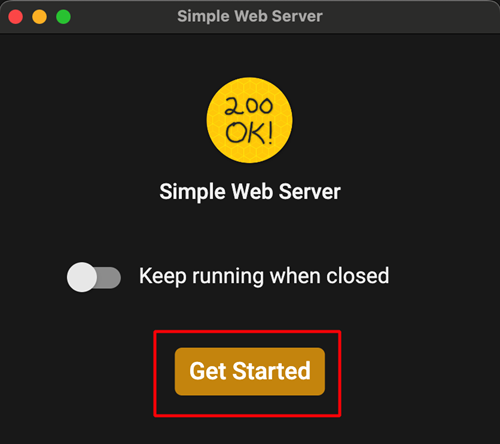
Click Get Started
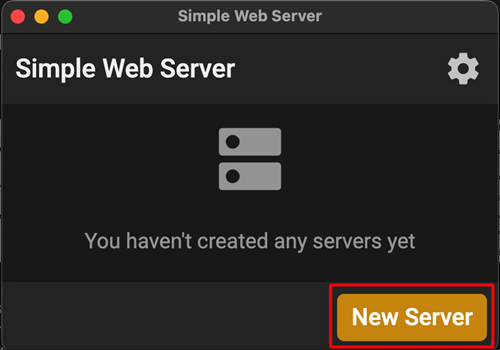
Click Get Server
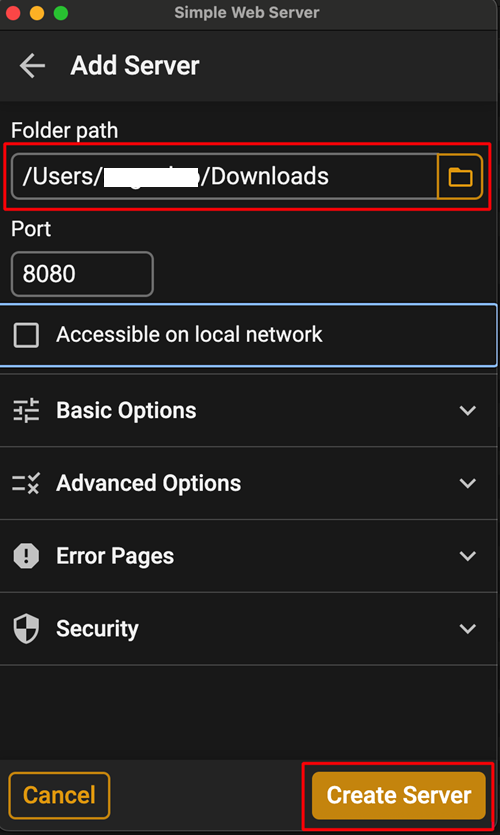
In Folder Path, select the folder where aaps-ci-preparation.html is located, and then click Create Server.
Seeing this screen means the server has been started.
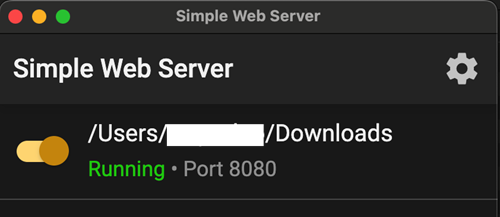
Do not close Simple HTTP Server. Please switch to your browser and open http://127.0.0.1:8080/aaps-ci-preparation.html
For the subsequent steps, please refer to the video below, starting from 1 minute 37 seconds.
Пропустите следующий раздел и продолжайте здесь.
AAPS-CI Вариант 2 – Загрузить имеющийся JKS
Подходит для пользователей, у которых уже есть JKS и они знают его пароль и псевдоним (Для
KEYSTORE_PASSWORD,KEY_ALIAS, иKEY_PASSWORDвведите ваши фактические пароль и псевдоним в GitHub - используйте те, что были в Android Studio, ниже показано, где вы их использовали.)
KEY + PASSWORDS

Ниже приведены примеры для разных платформ.
Выберите ниже вашу платформу: Android (предпочтительный вариант) или компьютер.
Compatible with Android (The simplest, recommended as the first choice)
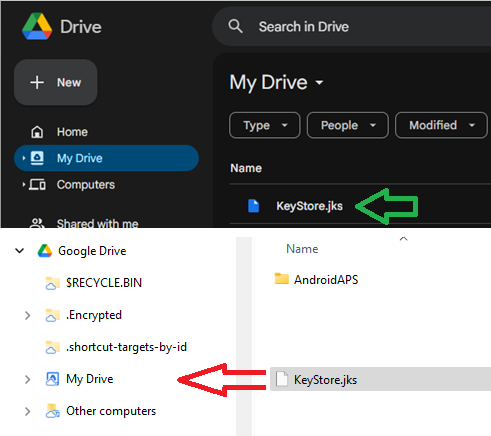
Copy your Android Studio key in your Google Cloud drive.
On your computer, search for the keystore file you used to build AAPS. It is named with the extension .jks.
Drag it into your Google Drive, either inside the browser or your mapped Google Drive.
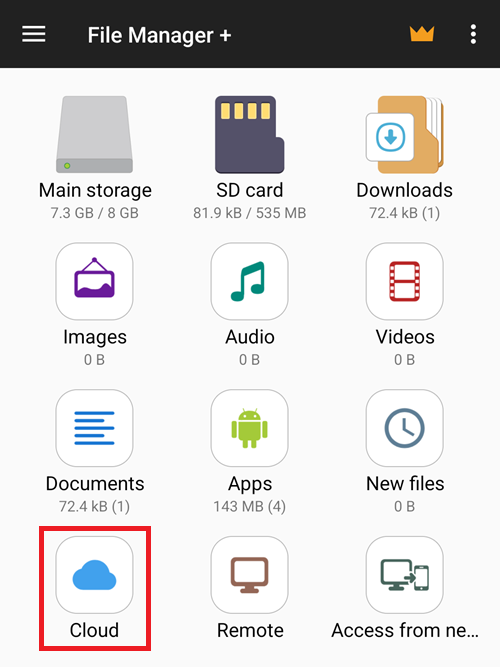
Open File Manager Plus and select Cloud.
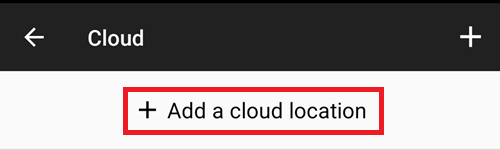
Add a Cloud location.
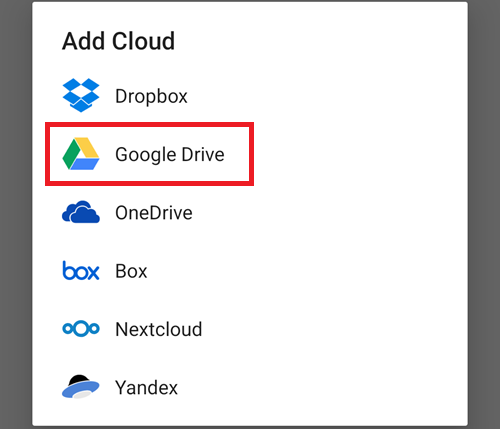
Choose Google Drive.
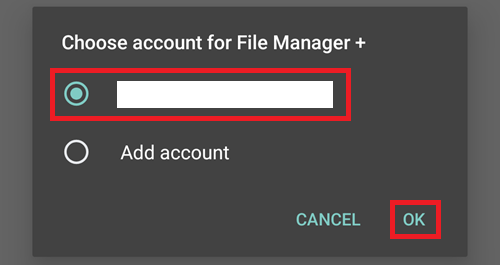
Select your Google Drive account email. Tap OK.
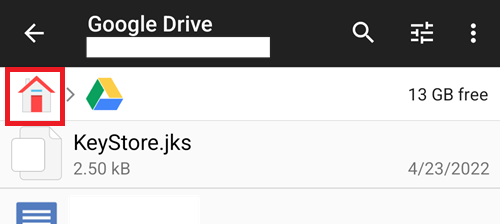
Your Google Cloud drive should display its contents. Now return to the app home page.
Open the CI preparation help file
Open the file aaps-ci-preparation-html you downloaded above.
Select Downloads.
And search for this file, tap it to open it, open it with Chrome, tap Just once.
It will open like this.
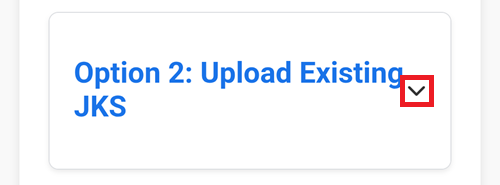
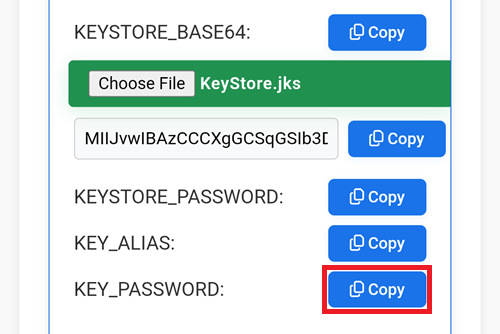
Scroll down to Option 2: Upload Existing JKS. Expand the interface.
Select Choose File.
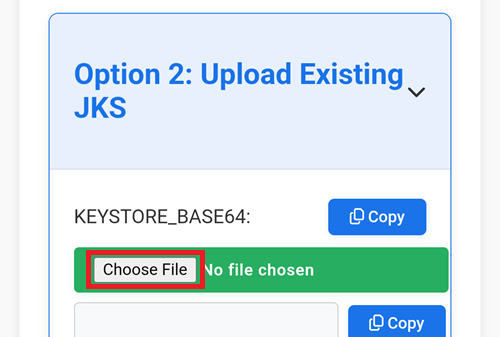
Pick your KeyStore file from your Google Drive files.

The field below will populate.
Keep this tab open.
Create a new secret in GitHub
Return to your GitHub browser tab: your own AndroidAPS copy.
Top right, tap the
...buttonSelect Settings in the list
Scroll down to Security and select Secrets and variables.
Now select Actions
Scroll down to Repository secrets and tap New repository secret
You will see this dialog (scroll down if it’s not visible).
Leave the tab opened like this.
Switch to the File Explorer Plus tab.
Tap the top Copy button.
Switch back to the GitHub tab.
In the Name field, paste the text you just copied. Use a long touch on the text box to show the paste menu.
Switch to the File Explorer Plus tab.
Tap the second Copy button.
Switch back to the GitHub tab.
In the Secret field, paste the text you just copied. Use a long touch on the text box to show the paste menu.
Tap Add secret.
Check the secret has been added, scroll down to verify.
Add a new secret: tap the New repository secret button.
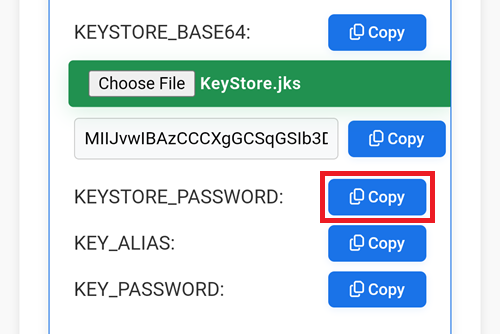
Switch to the File Explorer Plus tab.
Tap the top Copy button to copy KEYSTORE_PASSWORD.
Note: if you’re comfortable with typing the key names directly in GitHub you don’t need to Copy/Paste. If you’re not sure you will type exactly the same key name, continue like this. Note that you shouldn’t leave : at the end of the key name.
Switch back to the GitHub tab.
Paste the new key name.
In the Secret entry, put your KeyStore password (don’t leave it empty).
Tap Add secret.
Check the secret has been added, scroll down to verify.
Tap the New repository secret button shown above.
Switch to the File Explorer Plus tab.
Tap the top Copy button to copy KEYSTORE_ALIAS.

Switch back to the GitHub tab.
Paste the new key name.
In the Secret entry, put your KeyStore Alias (usually it’s
key0, lowercase with the number zero, not the letter O). Don’t let Android autocorrect it.Tap Add secret.
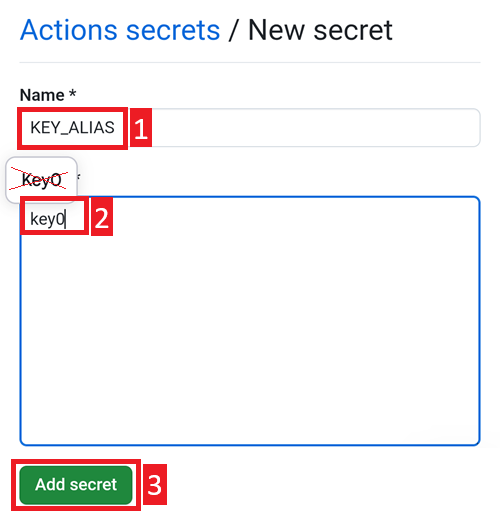
Check the secret has been added, scroll down to verify.
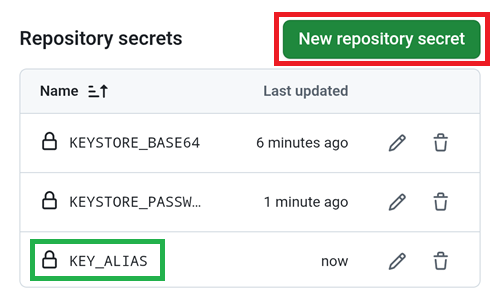
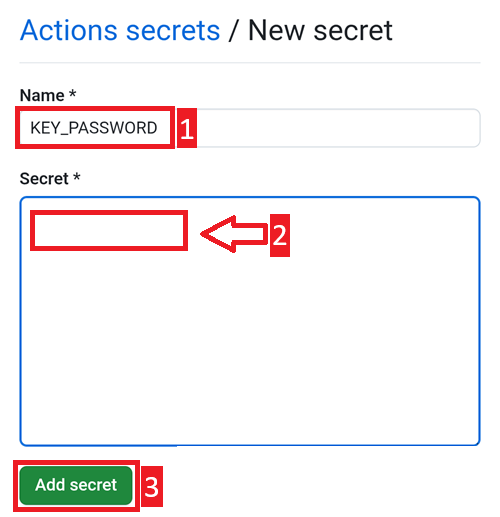
Tap the New repository secret button shown above.
Switch to the File Explorer Plus tab.
Tap the top Copy button to copy KEY_PASSWORD.
Switch back to the GitHub tab.
Paste the new key name.
In the Secret entry, put your Key password (don’t leave it empty). It is usually the same than your KeyStore password.
Tap Add secret.
Check the secret has been added, scroll down to verify.
Use a computer (supports Windows/Mac/Linux)
Install Simple HTTP Server If you are a Windows/Mac user, you can install it from the store. After clicking the link, you will be asked whether to allow opening it. Please choose Open Link.
Example on Mac:
get → install → open
Click Get Started
Click Get Server
In Folder Path, select the folder where aaps-ci-preparation.html is located, and then click Create Server.
Seeing this screen means the server has been started.
Do not close Simple HTTP Server. Please switch to your browser and open http://127.0.0.1:8080/aaps-ci-preparation.html
For the subsequent steps, please refer to the video below, starting from 2 minute 18 seconds.
AAPS-CI Авторизация Google Drive
Предупреждение
Независимо от того, какому из предыдущих вариантов инструкций вы следовали (вариант 1 или вариант 2), вы ДОЛЖНЫ добавить авторизацию Google Drive, чтобы успешно использовать сборку через браузер.
Note: If you already followed this part in the video, you can now skip to here.
Return to the File Explorer Plus tab.
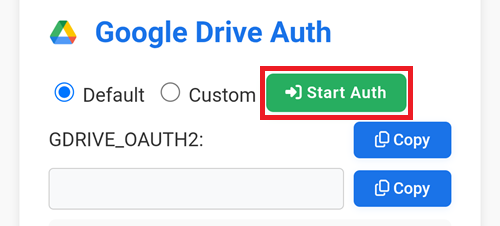
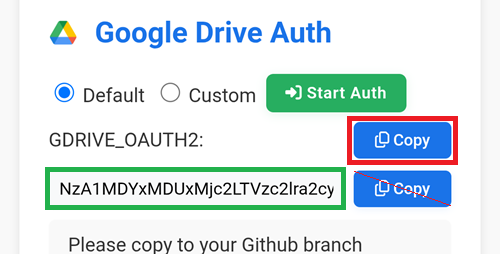
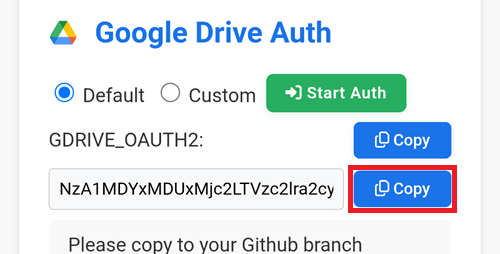
Scroll down to the Google Drive Auth section and tap Start Auth.
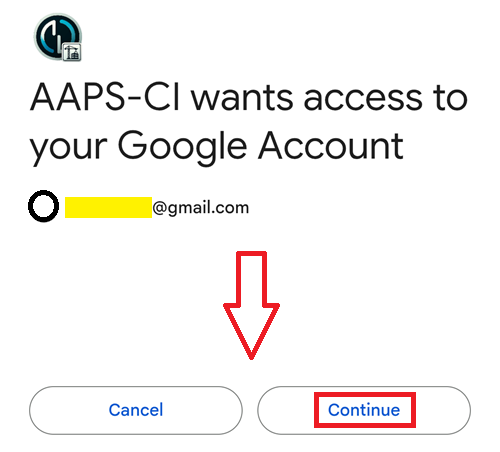
Select your Google account.

Scroll down and accept the access. The web page needs it to obtain the Google Drive authentication key.
Tap Continue.
The GDRIVE_OAUTH2 field will populate, tap the top Copy button.
Switch back to the GitHub tab.
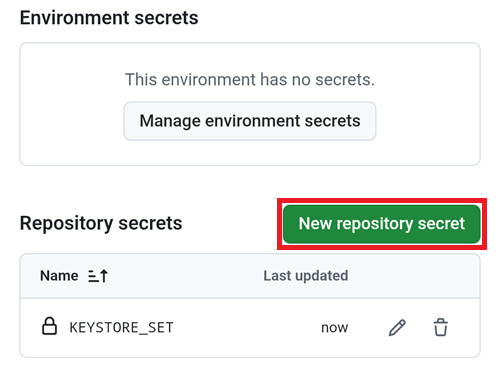
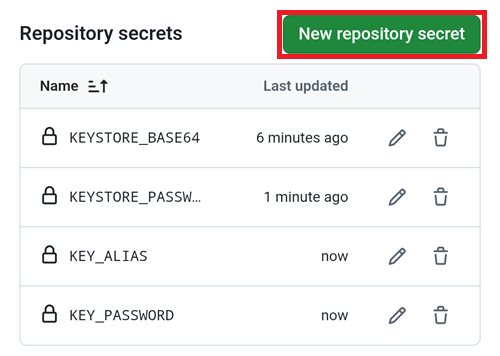
Scroll down to Repository secrets and tap New repository secret.
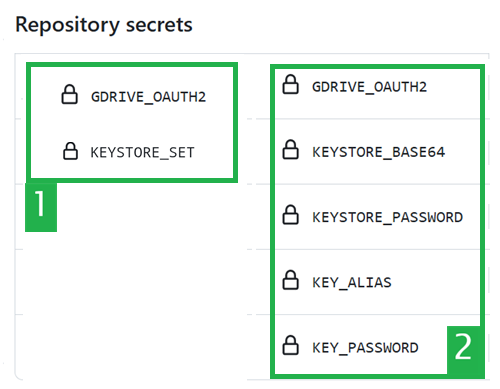
If you followed Option 1 you should see this:
If you followed Option 2 there will be more keys:
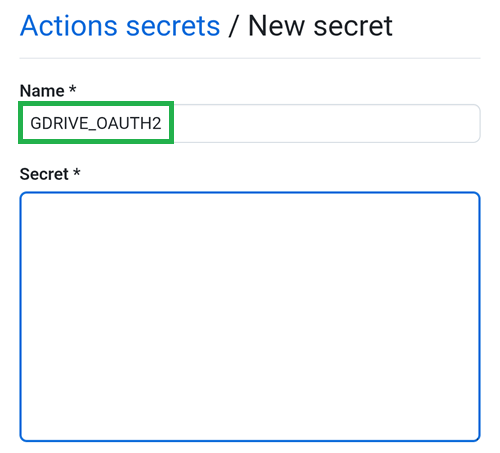
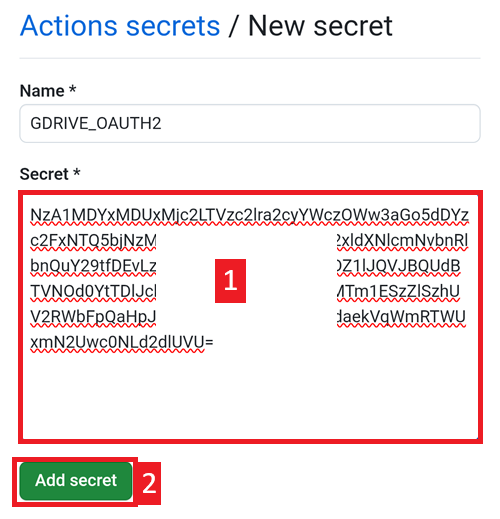
In the Name field, paste the text you just copied. Use a long touch on the text box to show the paste menu.
Switch to the File Explorer Plus tab.
Tap the second Copy button.
Switch back to the GitHub tab.
In the Secret field, paste the text you just copied. Use a long touch on the text box to show the paste menu.
Tap Add secret.
You should have either two (option 1) or five (option 2) secrets entries now.
GitHub will now be able to store the AAPS apk file in your Google Drive, once built.
AAPS-CI GitHub Actions to Build the AAPS APK
Suitable for general users.
Run the Workflow to Build the Signed APK
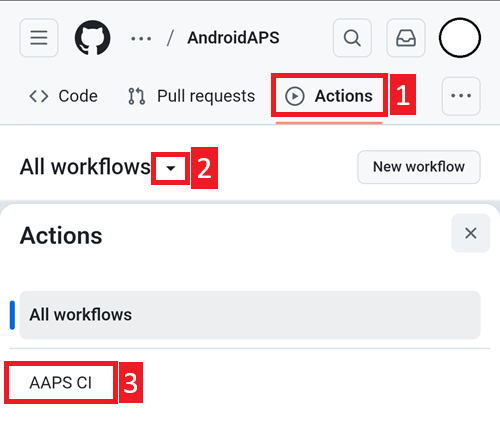
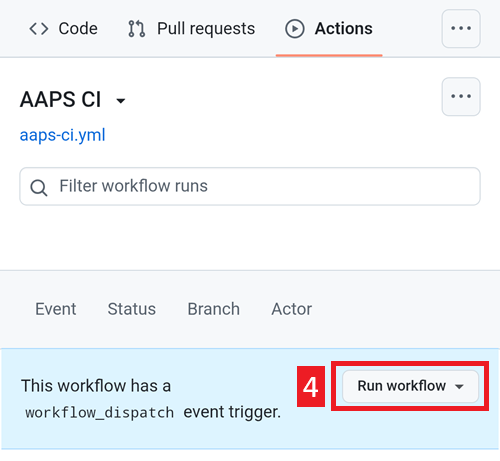
In your GitHub copy of AndroidAPS, select Actions.
Expand All Workflows.
Select AAPS-CI
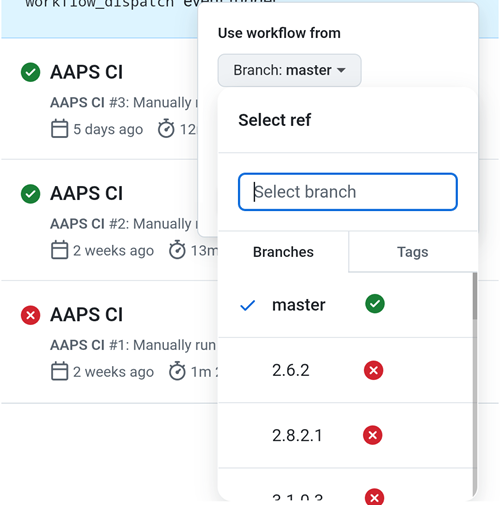
Scroll down and tap Run Workflow.
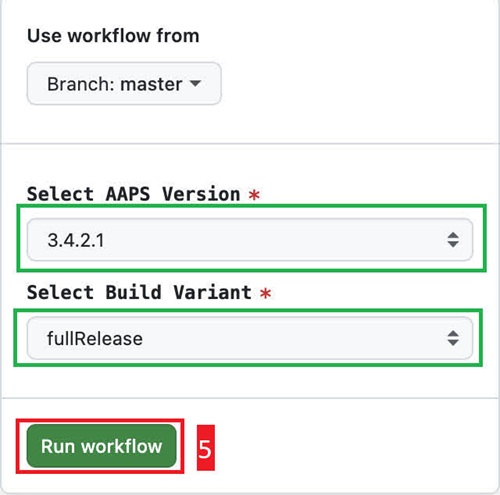
Select the branch you want to deploy (master), the variant (fullRelease) and tap Run Workflow.
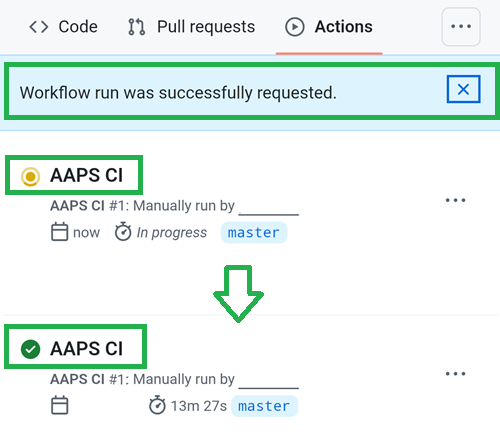
You will see the message Workflow run was successfully requested. Refresh your browser page and you will be able to monitor the build progress. When the action completes, the AAPS CI action will show a green tick mark. You have successfully built the updated version of Android APS.
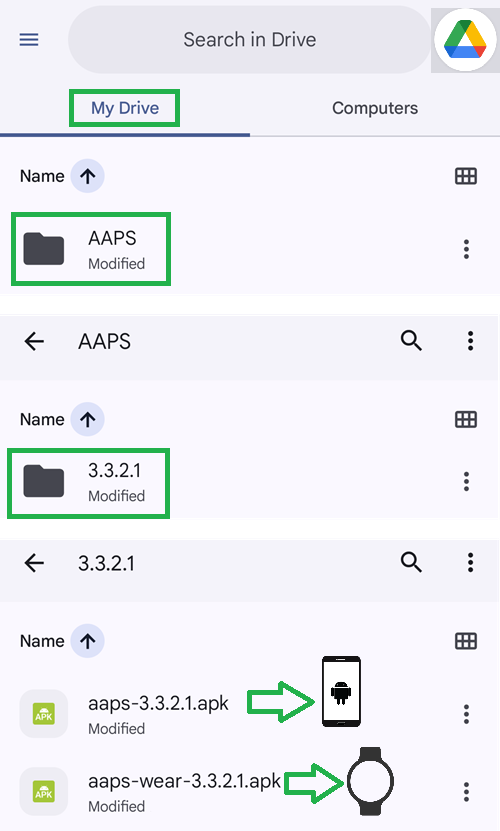
Install the AAPS APK
Open your Google Drive
Browse into AAPS, select the new version folder and you will find both the phone and Android Wear versions.
Build Version selection
Only AAPS versions from 3.3.2.1 and above will build with the Browser method.
Build Variants selection
Note: both Android and Android Wear apps will be built automatically.
Select the variant you need:
fullRelease: For regular pump usage with full functionality.
aapsclientRelease, aapsclient2Release: For caregivers (requires Nightscout)。
pumpcontrolRelease: To replace your pump app/controller
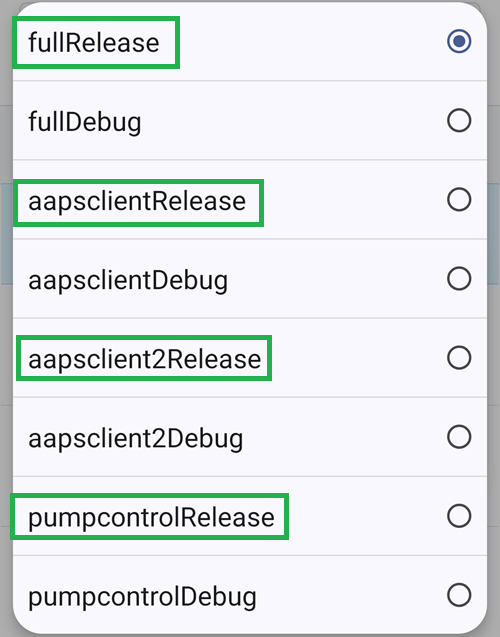
Variants ending with “Debug” indicates that the APK will be built in debug mode, which is useful for developers for troubleshooting.
AAPS-CI Troubleshooting
aaps-ci-preparation web page
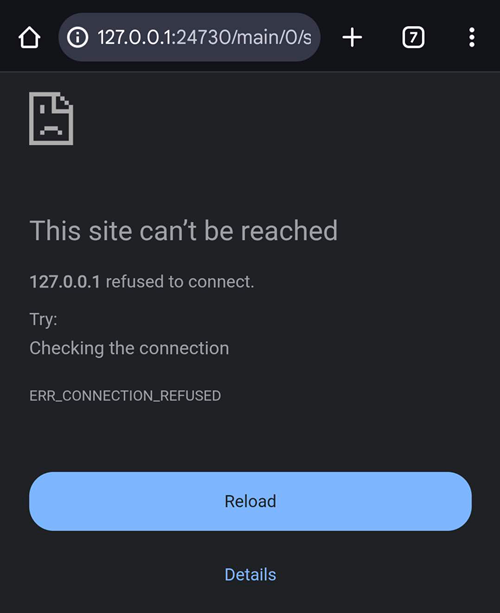
When you open aaps-ci-preparation.html using a file manager, it will start a temporary local server on your phone to display the webpage and receive the Google refresh token.
If you see the screen below, it means you have been inactive for a while, and the file manager has already shut down the local server.
Please reopen aaps-ci-preparation.html using the file manager app and complete the remaining steps.
Google Refresh Token Expired
Google OAuth2 refresh tokens will expire if not used for 6 months, and may also become invalid under other conditions (e.g., you have changed your Google account password, or manually revoked access). For more details, see the Google OAuth2 documentation.
You will see an error indicating that the access token is invalid, as shown below:
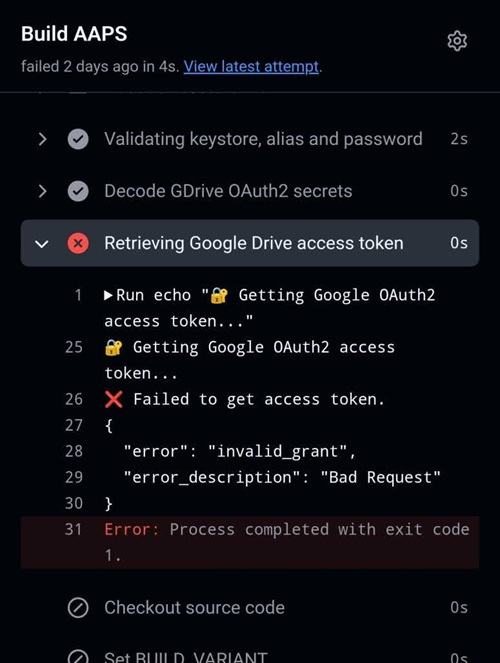
If your build fails due to an expired or revoked Google refresh token, you will need to redo the Google Drive Auth steps to obtain a new
GDRIVE_OAUTH2token and update the secret in your GitHub repository, then re-run the build workflow.
Disable Software That May Interfere With OAUTH Verification
Disable any VPN or security app (firewall, antimalware,…) on the phone before trying to get the OAUTH key.
Check GitHub Actions Permission Settings
Make sure GitHub Actions policies are set to “Allow all actions and reusable workflows” (Settings → Actions → General).

actions/checkout@v4 and actions/setup-java@v4 are not allowed to be used in xxxxx/AndroidAPS. Actions in this workflow must be: within a repository owned by xxxxx
Предупреждение
Customizations are usually not necessary. This is for your information ony.
If you want to add a specific commit to your branch, please use cherry-pick.
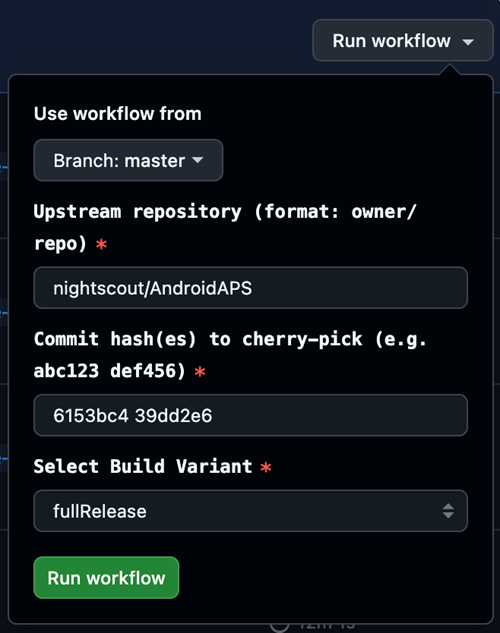
Use workflow from Branch: Please enter the branch name you want to cherry-pick to.
Upstream Repository: Please enter the repository name you want to cherry-pick from.
Commit SHA: Please enter the commit SHA you want to cherry-pick.(like git commit hash)
Select Build Variant: variant
CI KeyStore Export
If you want to export your stored keystore, use this method.
This script will export your previously configured keystore information (from Option 1 or Option 2) as a password-protected ZIP file to the /AAPS/KeyStore directory in your Google Drive.
Предупреждение
Before using this export method, make sure your keystore and Google Drive settings have been completed.
Steps:
Add ZIP Password Secret:
Go to your repository’s Settings → Secrets and variables → Actions
Click New repository secret
In the Name field, enter:
ZIP_PASSWORDIn the Secret field, enter your custom ZIP encryption password
Use only English letters and numbers for the password (no special symbols)
Click Add secret

Run Export Workflow:
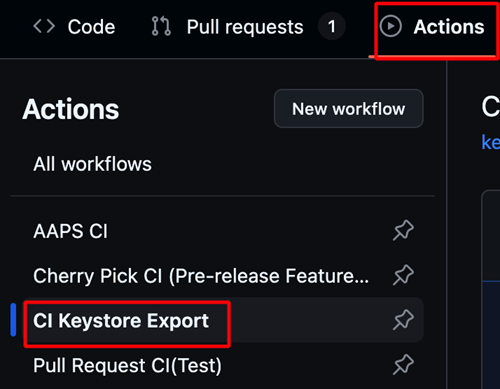
Go to the Actions tab in your repository
Select CI KeyStore Export
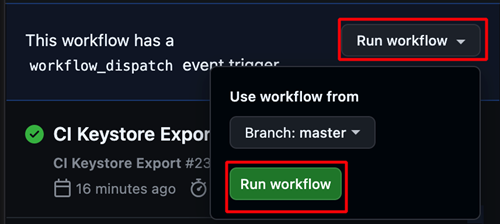
Click Run workflow
The exported keystore ZIP file will be saved to your Google Drive